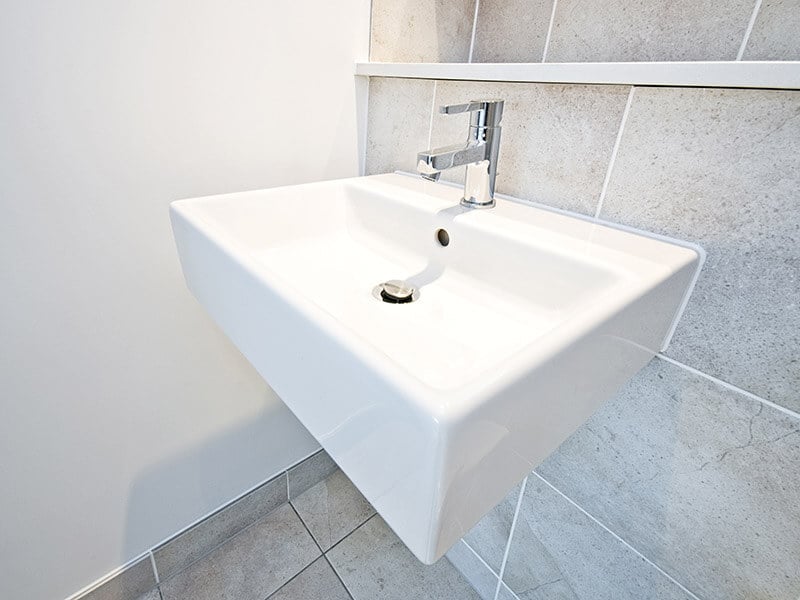
Bathroom Sink Plumbing Parts: How Do They Work?
With advancements in technology, today’s bathroom sink plumbing parts and their working mechanisms have rendered enhanced functionality to toilets. However, over time and excessive usage, these parts are bound to malfunction or break.
Now, when these bathroom sink plumbing parts fail to operate normally, it leads to headaches such as leaks and blockages. So, it is essential to know about the different parts of a bathroom sink and their working mechanisms.
Most individuals have at least an uncertain belief about how a toilet sink functions. But some might have less knowledge about what components are, which can be an issue while purchasing replacement components.
So, here in this article, I will uphold the different bathroom sink parts and how they function to form an effective system.
20 Crucial Bathroom Sink Plumbing Parts
Before you know about the complete mechanism of bathroom draining, here is a detailed focus on various parts that involve the functions. Have a look.
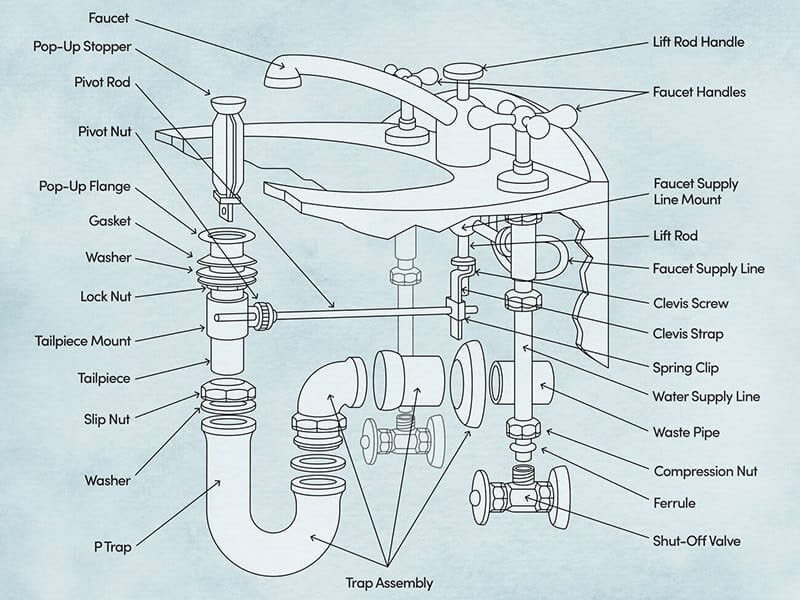
1. Shut-Off Valve
This part is where the water arrives from the main supply to the bathroom sink system. If you wish to stop the water flow into your bathroom sink, you can easily turn off this shut-off valve before performing any plumbing job on your bathroom sink.
Water arrives at these shut-off valves under pressure. There are commonly two shut-off valves, one for cold water and another for hot water. The water reaching the heated water shut-off valve arrives from the heater, while the water reaching the cold shut-off valve arrives from your primary supply.
2. Compression Nut And Ferrule
The shut-off valve is attached to the water supply cord, which carries the water to the faucet. A compression nut and a ferrule remain attached to these two components to ensure a watertight and firm seal.
The compression fitting usually works as one of the most versatile methods for connecting the hard plastic or metal tubing in a bathroom drainage system. As soon as the ferrule starts moving axially in its fitting body, the angled shape of the body will compress the end of the ferrule’s outer diameter of the tubing.
3. Water Supply Line
The water supply line, also called a supply tube, is a small section of tube that takes water to the faucet from the shut-off valves. The water supply line in a bathroom’s drainage system is usually composed of plastic, chromed copper, or wire mesh that connects to the shut-off valve.
The water reaches the supply line under pressure. This pressure pushes the water to the faucet, making it ready to drain away on the opening of the tap.
4. Faucet
Another relatively common bathroom plumbing part is the faucet, also called a “tap.” It is the component through which water comes out to you for your use.
The faucet in your bathroom drainage system works as a fixture that can draw or regulate water flow from a pipe. There are usually three main types of faucets available: single handle, widespread, and center set.
5. Faucet Handles
I’m sure everybody is aware of this part of the bathroom sink drain. Faucet handles are available in many sizes, styles, and shapes, but their objective is similar. You need to turn it to unlock them when you need water, and you have to turn the faucet handles in the opposite way to shut them off when you need the water to stop running.
Some may have more than one faucet handle. For example, one might be for cold, and one for hot water in some bathroom sink drains, while in others, the cold and hot water gets regulated through a lever.
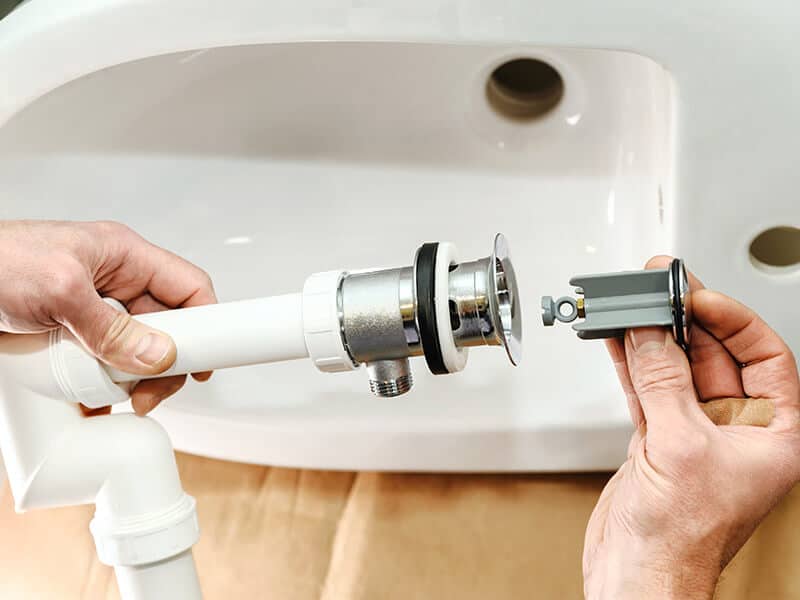
6. Pop-Up Stopper
This part of the bathroom sink is positioned in the plug slot and moves down or up when utilizing the lift rod handle. Periodically toilet sinks don’t possess these. Instead, bathroom sinks integrate a stopper on a line that you use by hand.
The pop-up stopper in the bathroom sink works as a simple mechanical device, which uses a system of chains and levers for moving the drain stopper up and down. Through the movement, it seals the sink bowl. The knob of the lever stays connected to the lift rod, which remains fastened to many clevises.
7. Lift Rod Handle
It is the part of the bathroom sink drain that regulates the stopper. We generally push the lift rod handle to raise the stopper and pull the handle to lower it down.
As the lift rod handle gets pulled upward, it also pulls the pivot rod up. As a result, the pivot rod of the lift rod handle stays attached to the stopper, which remains pulled down, effectively sealing the sink.
8. Pop-Up Flange
This pop-up flange moves up and down in the plughole while keeping the system watertight, staving off any water from dripping through.
The flange in the sink works like a collar that sits surrounding the drain. The pop-up flange is usually made up of metal or plastic. In case any crack appears on the flange, it can cause water leakage through the bathroom sink.
9. Washer And Gasket
The casing for the pop-up flange and pop-up stopper is attached to the following segment by a gasket. It also includes a washer that prevents any leaks and makes sure that there is a watertight seal.
The faucet washer usually comes as a small and round rubber disk, which resembles a wide ring of a tiny donut. The washer fits inside of the compression faucet to offer a very tight seal.
10. Locknut
Below the washer and gasket, the lock nut fastens the upper portion of the drainpipe to the tailpiece.
The locknuts of the sink drain comprise a soft metal such as zinc composite, which will not corrode easily.
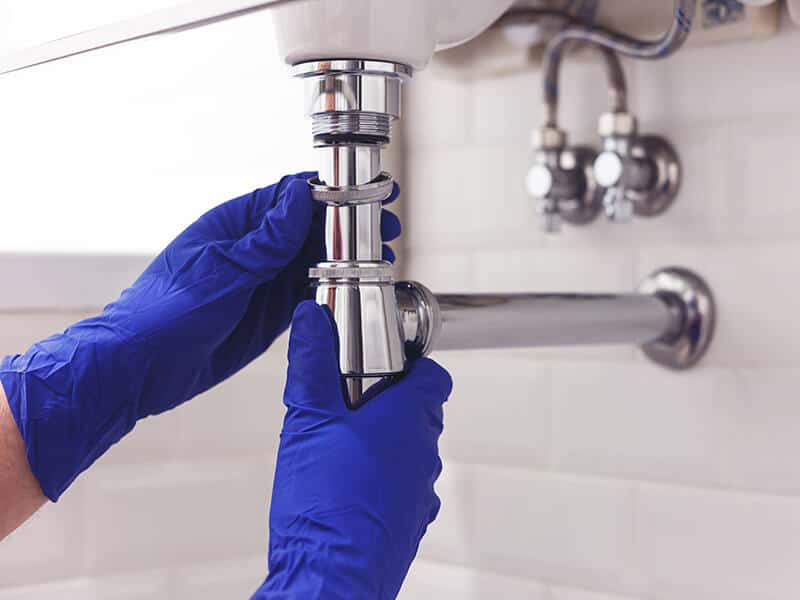
11. Tailpiece
This tube section carries water and other trash from the bathroom sink through the waste tube and down to the P-trap.
The tailpiece in the bathroom sink system works as a straight section of pipe, which further connects to the bottom area of the sink drain. The tailpiece attaches to the drain fitting using a slip nut.
12. Tailpiece Mount
If there is a pop-up stopper in your bathroom sink, there will also be a tailpiece mount. It is the portion of the bathroom sink drain where the flat rod that operates the stopper joins the tailpiece. This rod goes down and up to regulate the pop-up stopper.
If it is necessary to eliminate the stopper for clearing a blocked sink or any other cause, you will first need to remove the screw from the tailpiece mount.
13. Pivot Nut
The pivot nut attaches the stopper rod to the tailpiece mount. It enables the pivot rod to shift down and up, regulating the stopper.
The pivot nut is used in holding the horizontal arm onto the pop-up setting. So, to eliminate the stopper rod, you have to remove the screw from this nut.
14. Stopper Pivot Rod
If a sink in your bathroom has a pop-up stopper, the lift rod handle stays attached by a few parts to the stopper. The pivot rod is a flat metal that joins the tailpiece at the tailpiece mount and remains secured by the pivot nut.
This part is attached to the stopper inside the tailpiece. As you use the lift rod handle, it will shift the rod, which in turn, would displace the stopper down or up.
15. Spring Clip
It is a tiny clip, mainly made of metal. A connection exists between the rod and clevis strap through this clip. The spring-clip is also referred to as a Terry clip.
Using a spring clip enables the rod to stay attached. Also, it makes the removal of the rod easier with a simple push into the clip. These fasteners find significant usage in making the bathroom drainage system more effective and robust.
16. Clevis Strap
It is a straight piece of metal with holes attached to the lift rod handle at the top and the rod at the bottom in the bathroom sink with a pop-up cork.
When you pick the handle up, the strap lifts, pulling the edge of the rod attached to it. It results in the other edge of the rod shifting down, and since it is attached to the cork, this takes down the stopper, shutting off the sink’s drain.
When you wish to pull the cork up again to drain out the bathroom sink, you only need to thrust the handle down, shifting the strap down. It will lift the other rod end, pushing the cork up and enabling the water to stream.
17. Tailpiece Slip Nut
The tailpiece attaches through this nut to the P-trap. It also includes a washer to make sure there is a watertight seal.
To detach the P-trap for washing or other reasons, you only need to remove the screw from the tailpiece slip nut to loosen the P-trap.
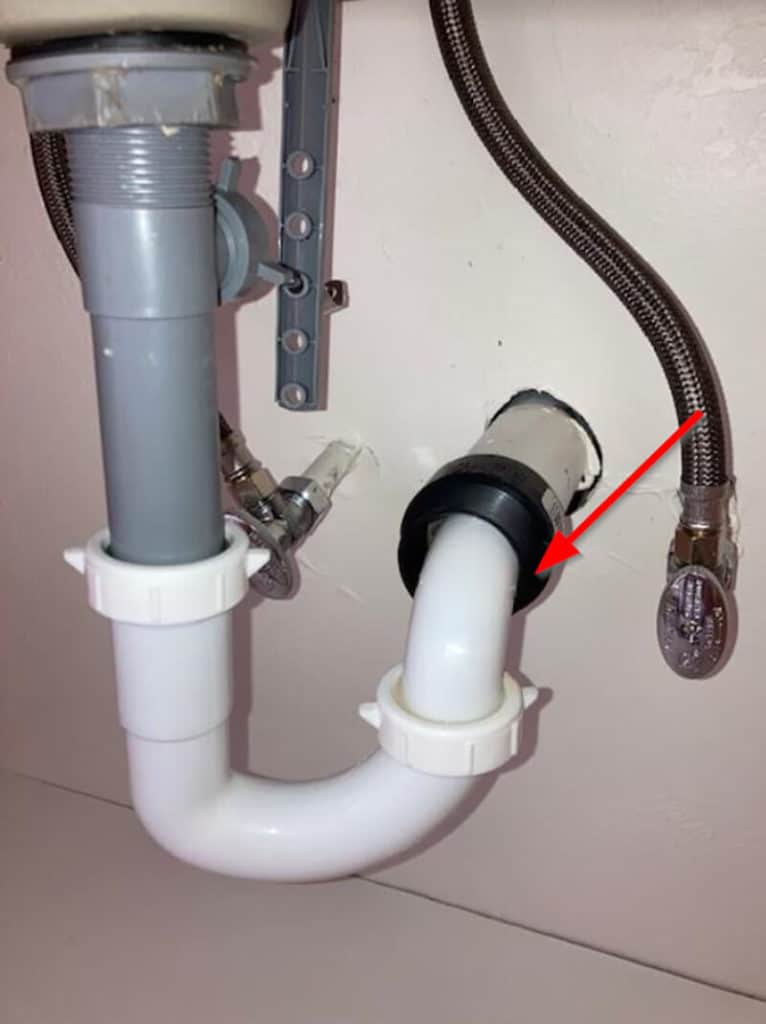
18. P-Trap
P-trap is a curvature in the drain tube that enables water and other trash to stream through. But it conserves a certain proportion of water after every utilization to create a seal. It is crucial because, without a P-trap, the water from the pipe would flow through the tube into your residence, generating a bad smell.
This part is so named because of the form of the bend, which appears a bit like “P.” Few P-traps also contain a clean-out cork, enabling you to wash the trap effortlessly without requiring you to eliminate the trap.
Unlike the water that reaches the faucet, the water leaving the bathroom sink via the drain does not stay under pressure. Instead, it depends on gravity.
Gravity results in the water streaming through the tailpiece, and the load of the water is adequate to carry it through the P-trap while leaving sufficient water in it to generate a crucial seal against unpleasant smells.
19. Trap Assembly
This part includes the P-trap itself and many other components that attach it to the trash pipe while staving off any leaks.
The P-trap consists of two parts, namely the trap arm and U-bend. The curved sections of the pipe will allow the sink to stay connected to the sewer line. The curved trap works as a safety feature that helps in holding the standing water. It prevents the sewer water from rising out of your sink drain.
20. Waste Pipe
The last part of the bathroom sink drainage system carries the trash moving towards the sewer system through the P-trap.
The waste pipe in a bathroom sink needs to be highly durable and easy to maintain so that it can run for a long time while giving you the ease of cleaning it well.
4 Simple Steps To Install A Bathroom Sink Drain
When installing a new bathroom sink drain, you’ll require three parts: a pop-up (or regular) sink drain assembly, a trap adapter, and a P-trap kit.
Step 1: Install Pop-Up Drain
The pop-up drain assembly commonly comes with your bathroom sink. However, it can be bought separately as equipment too.
To ensure a watertight seal, you need to apply a drop of silicone all around the drainage pipe. Before lowering the drain into the bathroom sink slot, don’t forget to utilize 100% silicone and a substantial bead.
From underneath the bathroom sink, you need to add a rubber circle by first putting in a drop of silicone to the lines to enable it to twist on easily.
Then, according to the assembly chart, you need to add a nut and plastic ring that you will first fasten and then deliver another quarter twist utilizing some slip-joint pliers to tighten it up.
After tightening everything underneath, you’ll need to ensure that you remove any silicone from the bathroom sink and the drain utilizing a washed, damp rag.
You can now connect the final component of the pop-up drain assembly, which contains a rubber band that will generate a seal with a steady metal tube. Then, tighten all the parts.
Watch this simple pop-up drain installation video.
Step 2: Install P-Trap Adapter
There will be a piece of tube pushing out of the wall for a new bathroom sink installation. To attach the P-trap, a trap adapter will be required, which needs to be attached to the pipe in the wall.
Brush some cement on the interior side of the P-trap adapter. Do the same for the exterior of the drain too. It ensures complete coverage of both outside and inside of the adapter. Then, push the adapter. Give it an insignificant twist motion, around a quarter bend.
Watch this simple video on how to install a P-trap adapter
Step 3: Install Trap
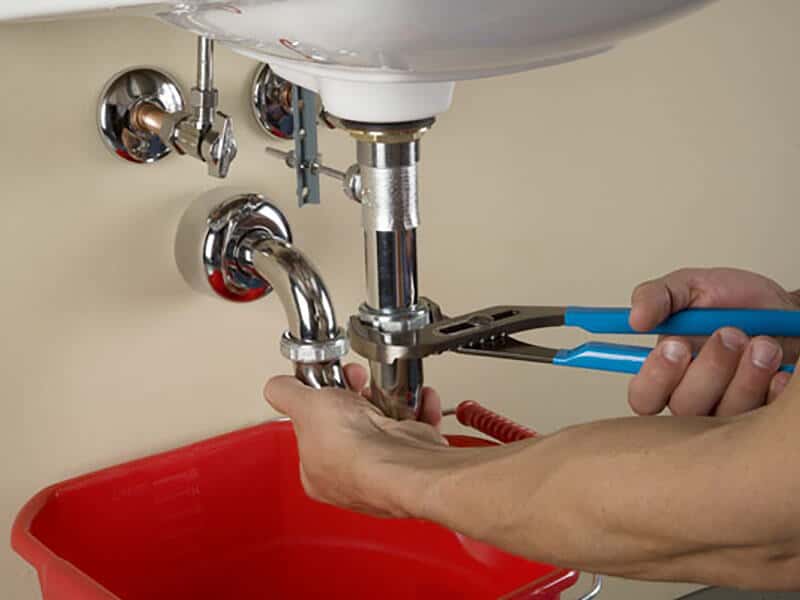
The equipment’s components commonly come in two slip joint nuts, two rubber or plastic washers, and a waste drain.
Begin by attaching two black tubes. Next, you need to drop a nut onto the waste drain and push it against the other tube, then screw the nut. No plastic or rubber washers are required here.
Then, get the washer that will fit in properly to the drain under your bathroom sink. You will notice that one of the washers is very loose, but another one works perfectly. Position a slip joint nut on the tube first. After that, place the washer.
It’s crucial to notice the direction of the washer when utilizing slip joints. Ensure that the pointed side is confronting whatever you’re attempting to attach to it.
Then, attach the waste drain to the wall. Your tube may be too long, but you can easily shorten it utilizing a hacksaw.
Once it is shortened, drop in a slip joint facing you. Then put in another nut confronting the wall, and finally, the washer tapered sideways towards the wall. Fix the tube into the wall and tighten it onto the P-trap adapter.
Finally, put in the U-shaped tube and attach it’s each end with slip-joint nuts. Again, loosely adjust and tighten the parts as required to ensure everything gets arranged in a line without emphasizing any joints. If your components do not align well in a line, and you find yourself pushing a joint, you’ll possibly end up with a small hole.
Once everything is lined up, screw all the nuts. Then, utilize some slip-joint pliers to screw them up so that they are snug and well-fit. However, ensure not to tighten it too much.
Check out this easy video on how to install a trap.
Step 4: Test For Leaks
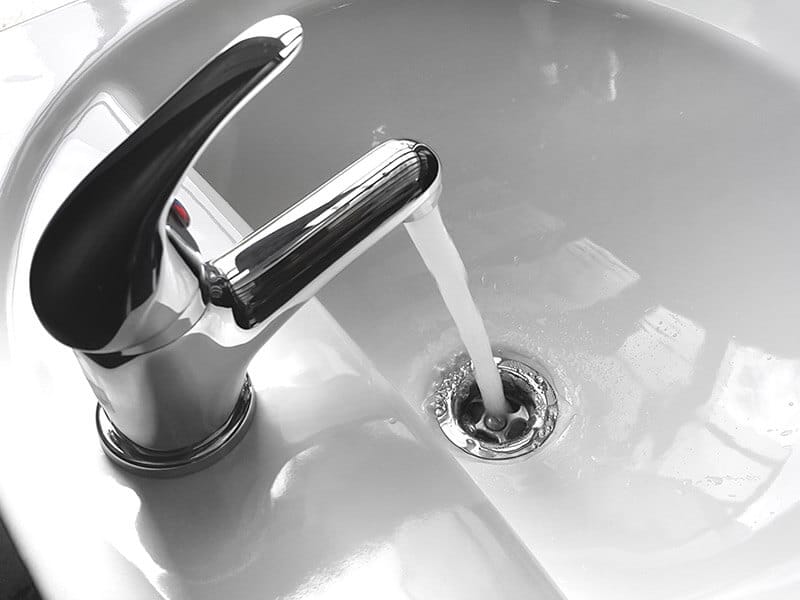
The final step is to examine the bathroom sink drain for any leaks. But, first, allow the faucet to run and test the tubes for leaks.
If everything seems fine, go for the final tryout by filling your bathroom sink all the way and then flowing it out. Repeat this method a few times.
If you notice any leak, try fixing the leaky connection a little before examining it again.
FAQs
I hope by now you’ve got a clear idea about the different bathroom sink plumbing parts and how to install them step-by-step. However, for your better understanding, here, I have put forward a few commonly asked questions.
Key Takeaways
Bathroom sink drain parts are crucial for a managed plumbing system. Unfortunately, these sink drain parts are unfamiliar to most individuals until the parts stop working. To opt for the proper replacement of bathroom sink drain parts, you need to be familiar with the crucial elements of bathroom sink drains.
There are many kinds of bathroom vanities and sinks, each having its drawbacks and features. But by making simple restorations, your toilet sink can operate more efficiently and smoothly. So, did you find this article helpful? If yes, do share and comment below!