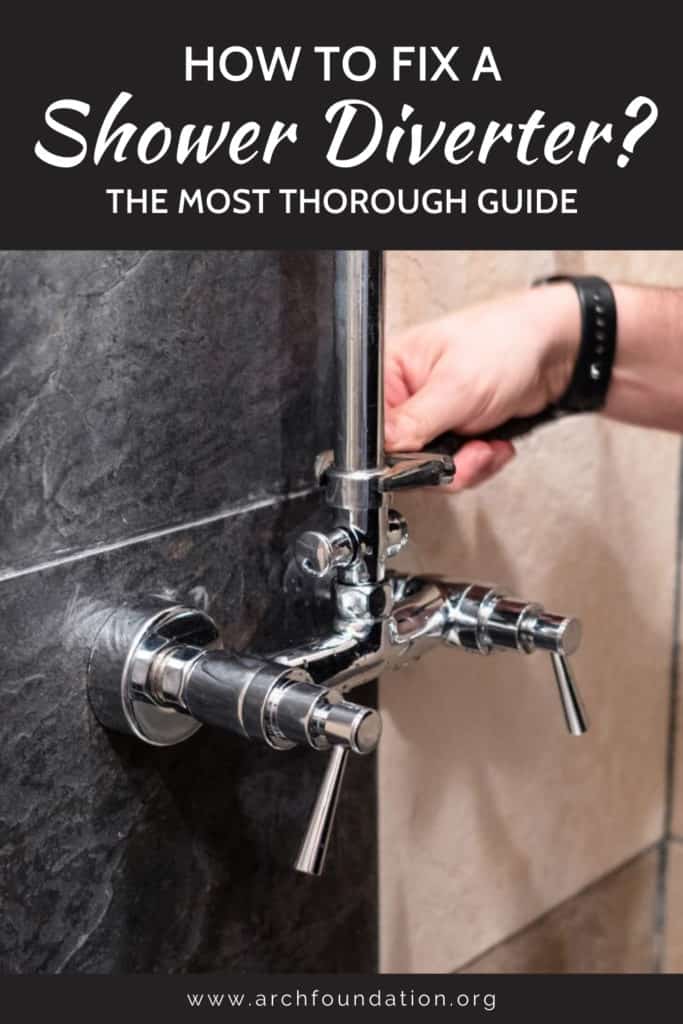
How To Fix A Shower Diverter? The Most Thorough Guide of
Is it challenging to learn how to fix a shower diverter? Frankly speaking, it is not, even when you don’t know anything about plumbing. The shower diverter is an amazing device, but over time, it needs a little check-up.
With this post, I guarantee that you will succeed on the first attempt. Not only will you cut corners, but you will also learn to do a job that impresses your partner. He or she will be very proud of you!
In Short, How Can You Repair A Shower Diverter?
First and foremost, you will identify what type of spout and diverter you are using. The repair procedure will be carried out in differing ways depending on which part is faulty.
- Loosen the diverter with cooking spray or WD-40
- Clean or soak the spout in a vinegar mixture or with a lemon wedge
If the cleaning solution does not bear fruit, you will need to replace the diverter or/and the spout.
- Replace the diverter (the tee, the two-valve, and the three-valve)
- Replace the whole spout
First, you will get to know some basic information about your shower diverter. Let’s go!
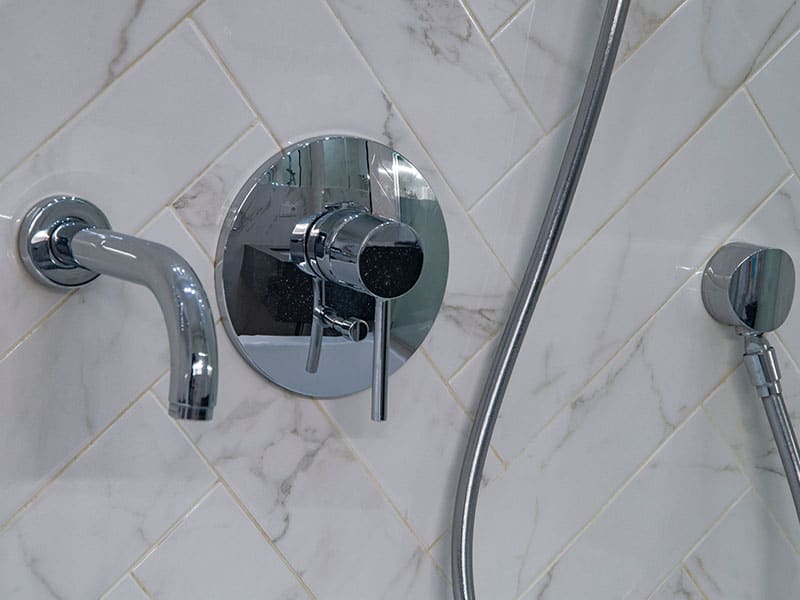
What Is A Shower Diverter, And What Does It Do?
A shower diverter, sometimes called a diverter valve, is a valve that allows you to switch the water stream between different outputs or use two of them simultaneously without having to install a separate water supply pipe.
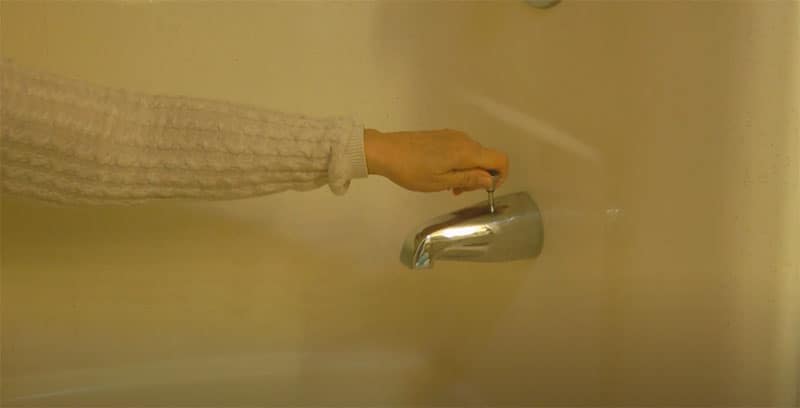
It comes in various types, but the most popular is undeniably a small metal tab located on the tub spout. The diverter valve can also be the middle faucet or a button depending on the number of outlets.
Overall, it does an incredible job diverting the water from the tub to the showerhead and vice versa. Not only that, you can control the water temperature from the tub faucet first without burning yourself, and you’ll be glad to know that most diverters are easy to install.
How Many Types Of Shower Diverters Are There?
The answer will vary depending on how you categorize them. Let’s dive deeper into each type of shower diverter and learn their differences as well as their pros and cons.
Classification According To The Number Of Outlet Points
A shower diverter can have up to four water outputs. With its flexibility, your shower time is sure to be unforgettable.
Tee Diverter
Also known as a single-valve diverter, the tee diverter is the most basic type and the most popular. It is located inside the faucet and controlled by a small tab on the spout. When pulled up, the water stream is diverted from the tub faucet to the showerhead.
Two-Valve Diverter
This type of diverter is normally accompanied by a single-handle faucet mounted on the wall. The water can be diverted easily to the tub faucet and the showerhead by the lever.
Meanwhile, the larger handle controls the temperature, although some types feature two separate knobs for the hot and cold water.
Three-Valve Diverter
The three-valve diverter is as commonly used as the T-diverter, yet the installation is more complicated. In short, the water can be diverted between three different outputs, for instance, the tub faucet, the showerhead, and the handheld.
And here’s the best part: you can choose to direct the water flow to one or two outlets simultaneously. It is usually controlled by a lever, sometimes a knob or a button as well, with the other two matching parts used to control the water temperature.
Four-Valve Diverter
As the name implies, the water can be sent to four different outputs, and two of them can run at once. For example, you can enjoy a hot bath while using the showerhead or the handheld. The tricky part is that the outputs must be lined up correctly in order to do so.
Classification According To The Design
A shower diverter can be exposed or hidden underneath the wall. What’s your pick?
Concealed Diverter
This is the ideal choice if you care about the curb appeal. The ugly pipework is hidden behind the wall, so the only visible part is the control plate with handles or buttons.
Moreover, this type of shower valve offers a wide range of options, from gold to chrome finish, rectangular to oval shape, and so on. Of course, with such intricate designs, you will have to pay a little extra to bring one home.
Exposed Diverter
The exposed shower diverter is usually a horizontal bar mounted to the wall and houses the working parts. Overall, the design is not neat, and since there are fewer options, this type of diverter usually does not cost you much.
Classification According To The Function
The next two shower valves will ensure that you are safe from being scaled and your shower experience is not ruined. Here’s how they do it.
Manual Valve
The manual valve is simple and easy to use. By pulling a lever up and down, you can set the water flow and temperature with ease. There’s a significant drawback, though, and it can be quite threatening sometimes.
If someone else in the house opens the tap water or flushes the toilet as you are enjoying the shower, the temperature will suddenly increase or decrease without warning. And yes, no one likes it when this happens.
Thermostatic Valve
Have you ever experienced the water abruptly getting too hot when someone else in your family turns on the faucet? That can be irritating, sometimes dangerous, and the thermostatic valve right here is your ultimate solution.
It frequently comes in two options, two and three handles, and can be controlled manually or digitally with a remote. With such fantastic features, the price is not low – but it’s a worthy investment, especially if you have children.
Now, let’s move on to some issues that you usually face while using the shower diverter.
What Are Some Common Problems With Shower Diverters?
Over time, the chances are that your shower diverter will not work as effectively as before, spoiling the bathtime fun. I have rounded up some common problems below, followed by the culprit and the solution.
Faulty Diverter
Over time, the diverter or some parts of it will likely be damaged. For instance, the gasket will wear out or the gate will slip out of where it should be, leading to blockage.
In addition, it is sometimes stuck, and it takes a great effort to pull it up or push it down. Even if you manage to do it, there’s this squeaky noise indicating that something’s off. The solution is to clean it or replace it with a new one.
Unknown Sound
At times, there’s this strange, high-pitched sound interrupting your singing as you are taking a shower. If you have ever asked yourself what it is, look no further – it’s your shower diverter telling you that it isn’t doing well.
Before finding its way to you, the water has to go through a small hole. Sometimes, due to the mineral deposits, the hole is clogged and eventually leads to blockage, resulting in a hissing or whistling sound as the water attempts to pass through the hole.
In this situation, it’s your job to clean either the showerhead pipe or the diverter.
Problems Concerning The Water Flow And Pressure
Provided that your shower diverter does not function properly, such as decreased water pressure, uneven flow, or leaks, there’s a high possibility that it has been stuck or malfunctioned. Sometimes, the causes are beyond the diverter itself.
A clogged showerhead can be the culprit, but it can also be caused by a worn-out mixing valve, a faulty water heater, or corroded pipes. Although most of these issues sound rather complex, you can fix them by cleaning or replacing the spout or the diverter.
Note: A custom shower will be difficult to work on your own, so it’s suggested that you seek professional help instead, especially if your home warranty is still valid. You will be charged a small service fee, but it’s usually reasonable and helps you avoid a huge mess
How Do You Repair The Shower Diverter?
Overall, fixing the shower diverter is not a daunting task, but it will cost you some time. Let me show you how to do it step by step, and illustrations will also be provided to make it clearer for you.
Cleaning The Spout/Diverter
Surprisingly, most of the inconveniences mentioned in the previous section can be easily resolved by cleaning the spout or the diverter. By doing so, all the mineral deposits will be removed thoroughly, giving way to the water stream.
Option 1: Clean The Spout With Vinegar
Cleaning the spout ensures that it is free from all the dirt, grease, and other sediments. Therefore, it’s well-advised that you do this regularly.
Step 1: Pour white vinegar into a plastic bag and dilute it with water if you wish.
Step 2: Wrap the bag around the spout so that the spout submerges completely.
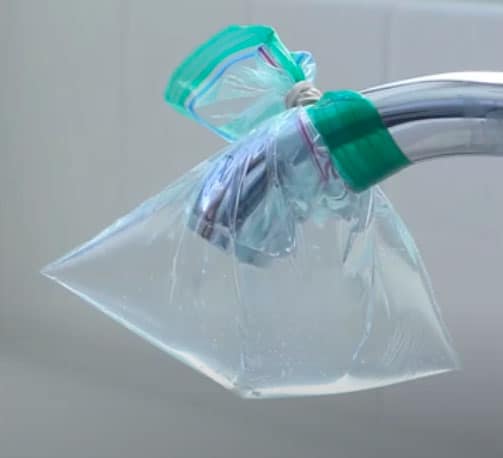
Step 3: Hold the bag in place with a rubber band or a string. Make sure that it’s tightened so that the bag won’t fall.
Step 4: Leave it for 3-4 days.
Step 5: Remove the bag and give your spout a quick wipe. Check whether the diverter works as it should.
Not only does this simple trick help get rid of the mineral deposits, but it also gives your spout a shiny look without costing you too much. Although other bathroom cleaners work as well, vinegar is a better option since it does zero harm to the environment.
Watch this video to know more:
Option 2: Clean The Spout With A Lemon Half
Lemon is also high in acidity, so it is as effective as vinegar. In fact, you only need a few hours to remove all the limescale from the spout.
Step 1: Remove the center of a lemon half.
Step 2: Press the open lemon half onto the spout’s end.
Step 3: Similar to Option 1, you will need to secure it with a plastic bag and a rubber band.
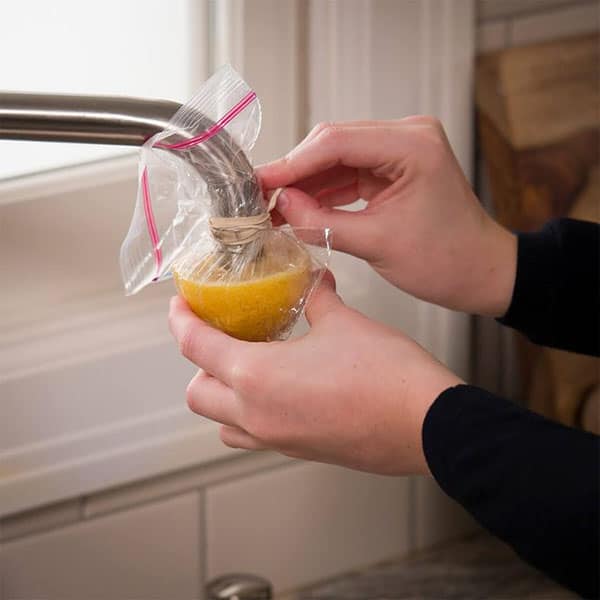
Credit: The Family Handyman
Step 4: Leave it for a few hours.
Step 5: Scrape off the buildup with a scrubbing pad or an old toothbrush. The spout has been restored to its former glory!
Option 3: Loosen The Diverter
Don’t give up yet if the diverter refuses to obey. Here’s another method with cooking spray that works wonders.
Step 1: Pull and push the diverter by hand so that it loosens a bit.
Step 2: Lubricate the tab with cooking spray or WD-40.

Step 3: Try pulling it up and pushing it down several times until it moves smoothly. Spray more if needed.
Step 4: Wipe the residue off the spout and the diverter. Check if the diverter works now.
Note: If you don’t have a cooking spray or WD-40, you can use a brush to apply cooking oil and follow the other steps as instructed. Do not use wax or hair spray, as they will damage the metal and plastic parts of your shower.
You’ll be astonished to know that cooking spray can fix a faulty diverter
Option 4: Soak The Spout In Vinegar
If cleaning the spout is not enough, you will have to bathe the spout. Of course, you will have to remove it first, and here’s how.
Step 1: Turn off the water supply to prevent flooding.
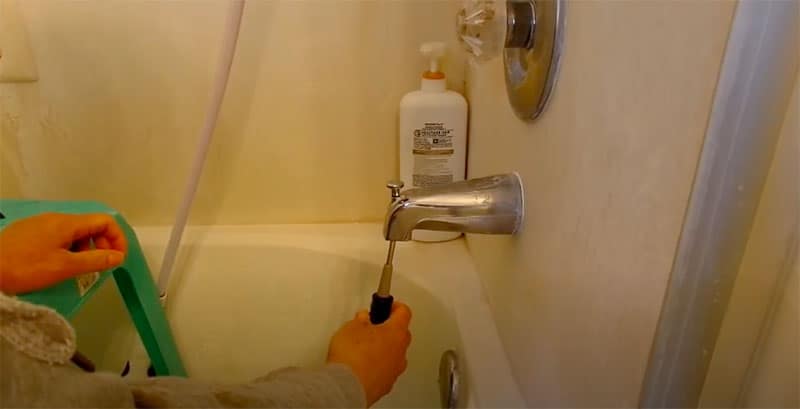
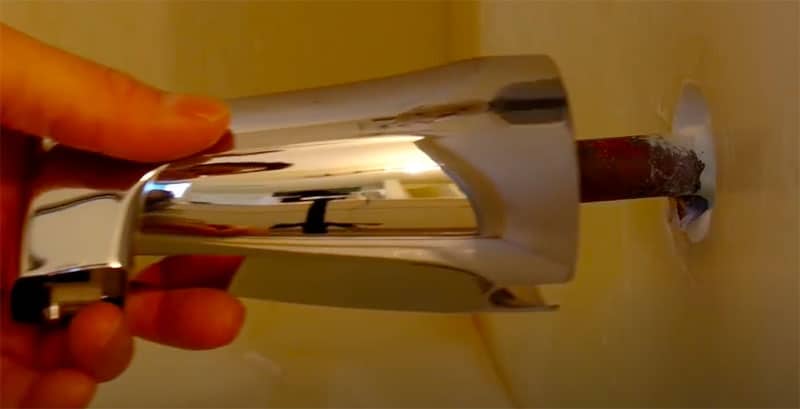
Step 2: You will need to figure out how the spout is attached to the wall in order to remove it. Typically, it has a screw underneath the spout, so all you have to do is unscrew and pull the spout out. If it doesn’t have on, try the following methods:
- Turn the spout counterclockwise by hand or with a wrench.
- Pry the spout off with a screwdriver or a palette knife.
Step 3: Remove the dirt and stains with a scrubbing pad or sandpaper.
Step 4: Let the spout submerge in vinegar and water.
Step 5: Leave it for 3-4 days. Check the spout every day and scrape off the dirt with an old toothbrush.
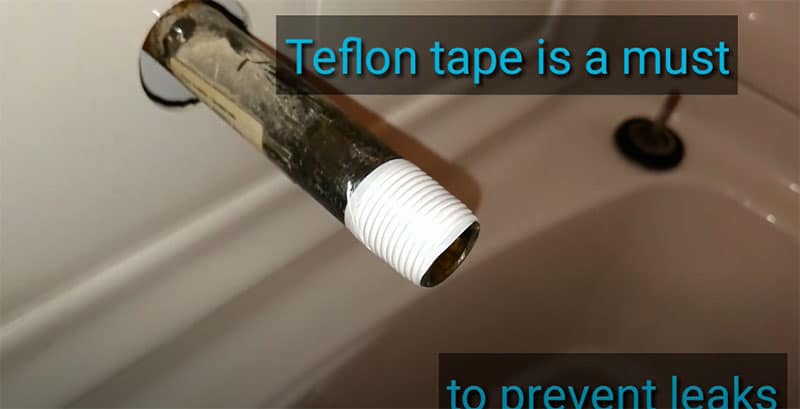
Step 6: Let it dry and put some Teflon tape on the tip before you reinstall.
Step 7: Put the spout back onto the copper pipe. Power up the water supply and see if everything’s back to normal.
By now, the spout and the diverter should be spotless and working properly. Unfortunately, if there are still leaks or similar problems with the water flow, it’s time to say goodbye to the old shower diverter kit and get a new one.
Replacing The Spout/Diverter
Bad news, if cleaning did not help, it’s time to move on to the final solution: buying a new spout or diverter, sometimes both, from the local hardware store.
Don’t worry; the components don’t cost much, and since you have already saved some money from calling in the plumber to help you with the installation, it’s a win-win.
And by the way, how can you tell which one is to blame: the spout or the diverter? You can inspect the condition and age of both fixings. If you are still unsure, bring them to the hardware store and have someone take a look.
Note: If you have a threaded sprout, make sure that the threads on the new diverter run in the same direction as the old one. Again, if this is confusing, ask someone for assistance.
Option 4.1: Replace The Tee Diverter (Tub Spout)
In most situations, you only need to replace the valve gate. Largely, most diverters are pretty cheap and straightforward to assemble, so you should be able to do the job without difficulties.
Step 1: Turn off the water supply.
Step 2: Even though you will replace the diverter only, it’s essential to bring the spout to the home improvement store with you as well so that you can find the exact replacement.
The spout can be pulled out in three ways according to how it is attached to the wall as mentioned in steps 2 in Option 3.
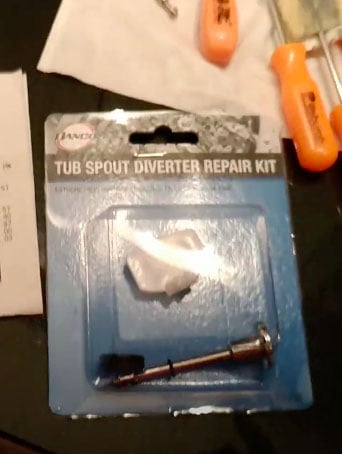
Step 3: Stop by your local hardware store and look for a tub spout diverter repair kit that fits the spout. Consult the employees if you are not certain about the model you have chosen.
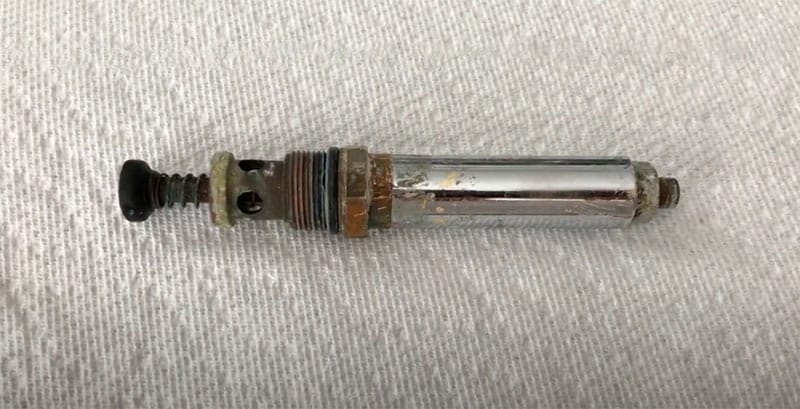
The kit consists of three components: a stem, which is the thing that you push and pull to divert the water, along with a plastic gate and a diverter gasket. Typically, the instructions are included, but I’ll show you how to do it if there isn’t one.
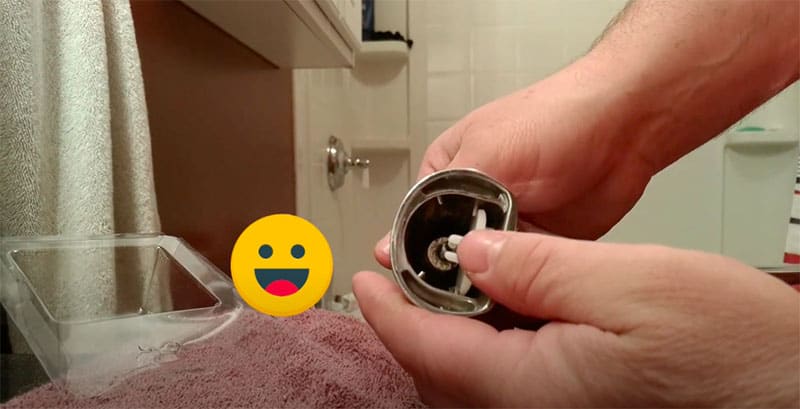
Step 4: Remove the old components. As you pull the diverter stem out, the old gasket and the gate should come off as well.
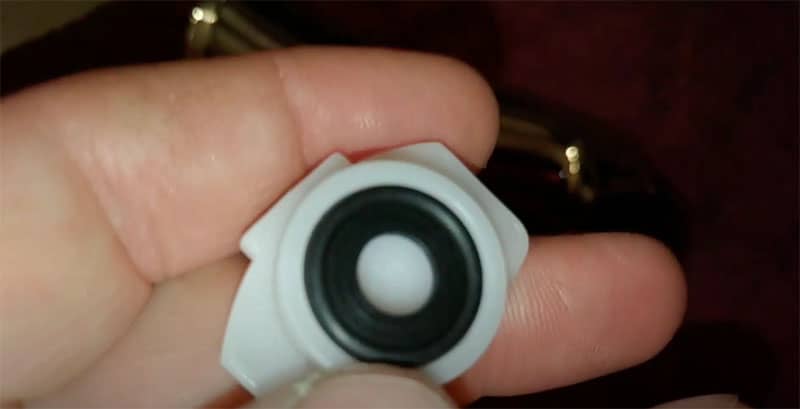
Step 5: Insert the new gasket into the plastic gate.
Step 6: Slide the gate with the gasket attached into the underside of the spout.
Step 7: Insert the new stem into the hole. Try pushing it to see if the movement is smooth. If it’s not, you will need to fabricate the plastic gate using sandpaper.
Step 8: Cover the pipe with Teflon tape.
Step 9: Reassemble the spout and make sure that it’s tightened.
Step 10: Turn on the water supply and do a test run. If there are no more leaks, congrats – you have done an incredible job!
Note: This guide applies to most tub spout diverters but not all. Some will be assembled slightly differently, so read the instructions carefully before you get into work. Should there be any confusion, you can contact the plumber for help.
Watch this video to know more:
Option 4.2: Replace Two-Valve And Three-Valve Diverters
Most two-valve and three-valve diverters are controlled by knobs or buttons, sometimes levers. Concerning the latter type, it is commonly used in old bathrooms. However, you can still expect to see it nowadays.
When you work with these types of diverters, you will notice that their piping mechanisms are sort of different. The number of copper pipes you will see corresponds with the number of outlets.
So, how do you know where the valve is? For the two-valve diverter, it will be the one that connects with the temperature dial. For the three-valve diverter, the valve is located on the middle pipe. The replacing process is the same for two types of diverters.
Step 1: Shut off the water supply.
Step 2: Pry the decorative mount off the correct handle.
Step 3: Unscrew and remove the handle. For old handles, it can be a little tricky to get them out. Use a faucet handle puller to help you.
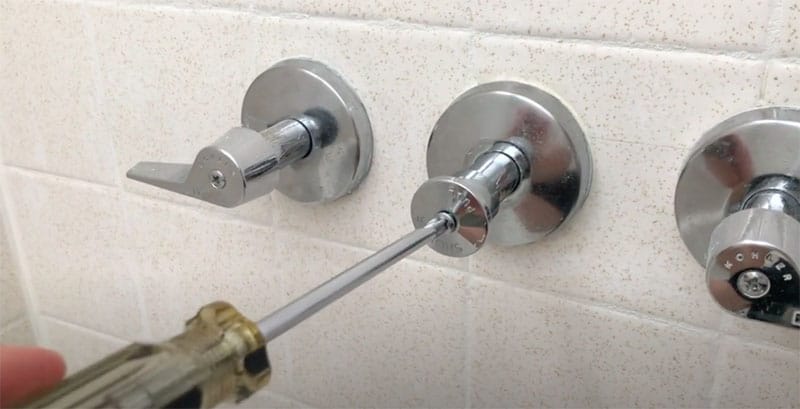
Step 4: Remove the escutcheon.
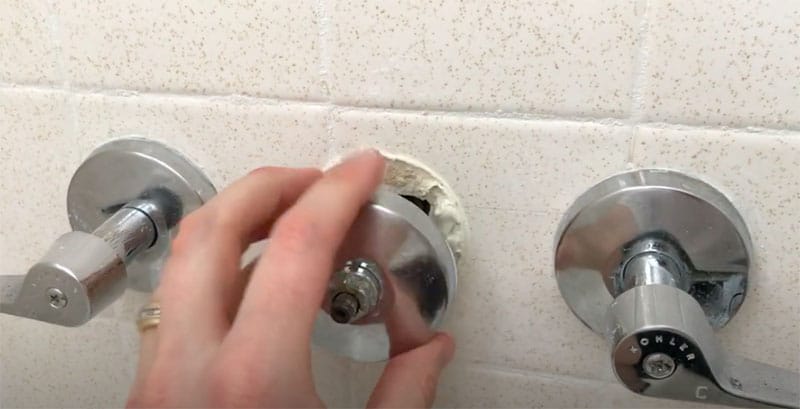
Step 5: Upon removing, you will see the diverter stem. Continue removing it by loosening the nut. Do it gently as the copper pipes are pretty delicate.
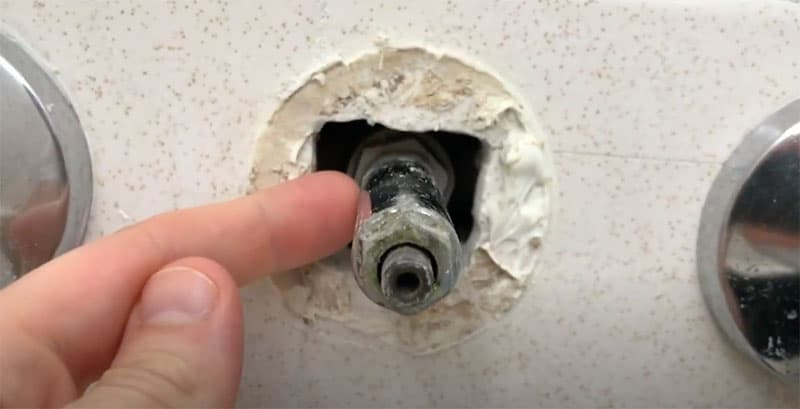
Step 6: Inspect the stem and replace any corroded or worn-out parts, such as the washer.
Step 7: Reassemble by doing everything in reverse. Make sure that everything is fastened to prevent leaking.
Step 8: Turn on the water supply and do a little testing. Does the water run properly now? If so, the repair is done!
You won’t meet any difficulty while repairing the 3-valve shower diverter
Option 5: Replace The Spout
Don’t sigh – replacing the spout is easy as pie. In fact, the steps are already mentioned in the removal procedure of the shower diverter, but I’ll repeat them so that you won’t feel at sea.
Step 1: As usual, you will begin by shutting off the water supply.
Step 2: Remove the spout. Again, refer to step 2 in Option 3 to identify the type of spout you have and the correct way to pull it out.
Step 3: Bring the old spout to the hardware store and get a new one. It should be the same model.
Step 4: The new spout should come with the installation guide, but you don’t need that anyway because it is really simple. Fix it onto the wall according to its design.
Step 5: Reconnect the water supply and test your handy work. You did it!
Watch this video to know more:
Keep These Tips On Your Mind For Future Repairs
I know you are already exhausted by now. However, don’t scroll through these brilliant tips and tricks – you will regret doing so!
- Avoid losing anything: immediately upon removing the spout, I suggest covering the drain using duct tape and closing the bathtub drain. The hardware parts are small, and once it falls down the drain, it will be tiring to get them out.
- Use Teflon tape as you reinstall: it will help create a watertight seal.
- Tighten everything but not too tight: overtightening will make it troublesome for future maintenance.
- Clean as you repair: you will want to give the copper pipe a quick clean to remove all the mineral build-up. Vinegar mixed with water is indeed the top-notch choice.
- Find exact replacements: the new parts should be exactly the same regarding the size and the design. Double-check as you pay; otherwise, you will have to make a return trip to the store.
FAQs
Are you still dazed and confused? If so, check out the next section – there are all the explanations for your questions!
Taking Care Of Your Shower Diverter
That’s it, my friend – you have mastered how to fix a shower diverter! There’s no need to wait and waste money on the plumber anymore when you can do it on your own. Even when there’s no problem with it, it’s advised that you clean it regularly so that it works well.
Do you have more questions? Or perhaps do you have some brilliant hacks for me and other readers? Share it via the comments below, and I’ll be more than happy to read them. Thanks in advance, and good luck!