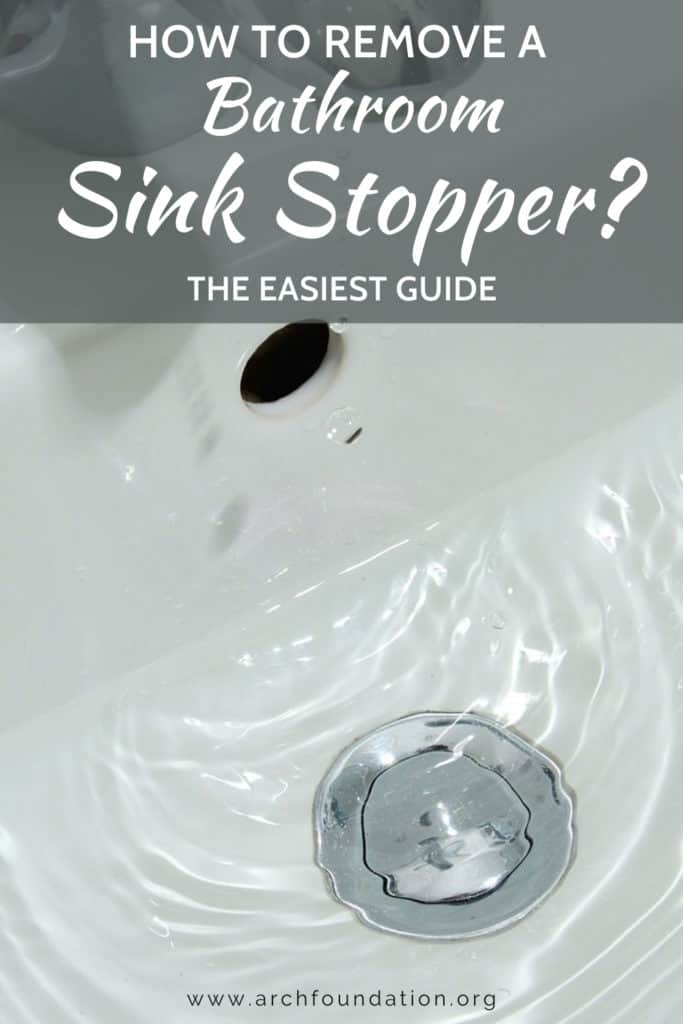
How To Remove A Bathroom Sink Stopper? The Easiest Guide
Well, here’s good news – you don’t have to be a plumber to know how to remove a bathroom sink stopper, and you don’t even have to bother calling a professional one to take a look. Why splurge your money on something that you can do by yourself?
If your sink is now a giant bowl of water, don’t wait any longer. Start scrolling down and get over this household nightmare!
How Do You Remove A Bathroom Sink Stopper?
Overall, the procedure is relatively straightforward and consists of four steps, with two additional steps to clean if needed.
- Remove the clip
- Unscrew the nut
- Remove the stopper
- Remove hair clogs
- Clean the drain
- Reinstall
In addition, I will provide you with some helpful tips so that you can finish the job quicker. No more wasting your time; let’s find out how to do it!
Why Do You Need To Remove The Bathroom Sink Stopper?
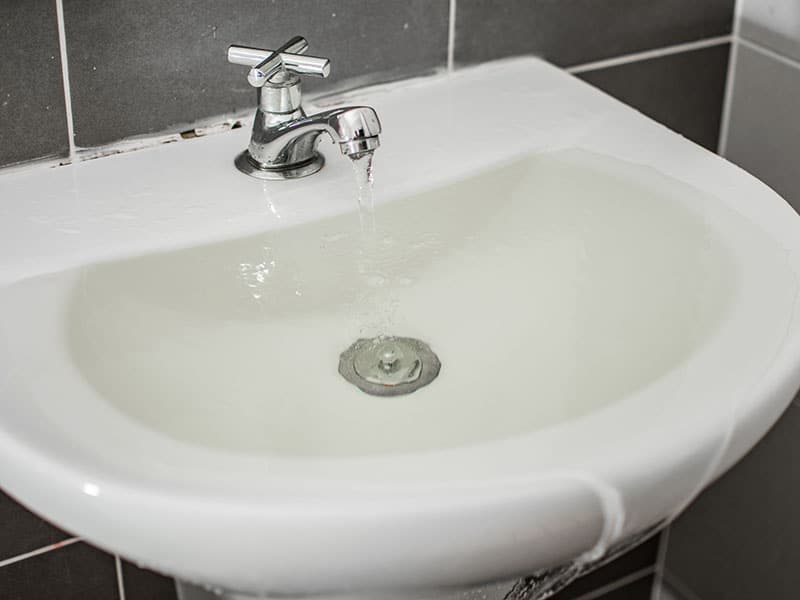
Although there are many types of drain stopper, the one typically used in the bathroom sink is the pop-up, which has a metal finish and comes with a lever on top of the overflow plate. Overall, the installation is pretty quick and straightforward.
However, removing the stopper is a whole new ballgame. There will be times when the water starts to drain slowly or even doesn’t drain at all. If such things happen, you’d better have the stopper removed and give it a quick check. And clean it, too, if you wish.
Tools You Need Before Getting Started
Before getting down to business, you will need the following tools, with the first three being used to facilitate the removal process and the rest to help you with the cleaning.
- Wrench or pliers
- Flashlight
- Bucket
- A small brush (an old toothbrush)
- Detergent
- Vinegar
- Hair clog removal tool
- Salt and hot water (optional)
All the tools are ready, what about you? Put on the rubber gloves, and let’s get this done!
6 Steps To Remove And Clean The Bathroom Sink Stopper
Here’s a thing: if your bathroom sink stopper is not too stubborn, it can be effortlessly removed by hand. If that doesn’t help, you will need to grab the tools and follow the instructions below.
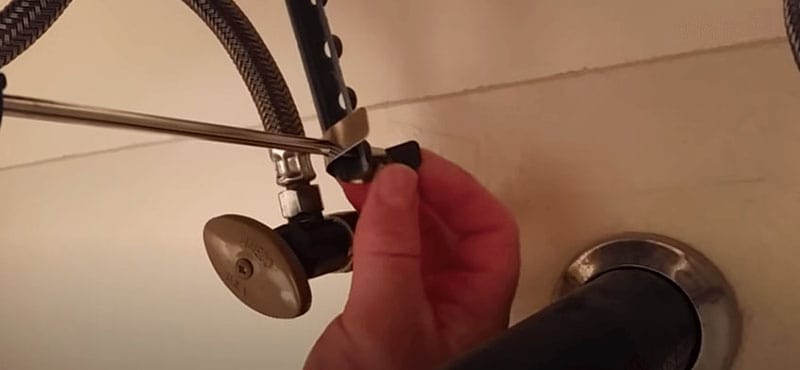
Step 1: Remove The Spring Clip
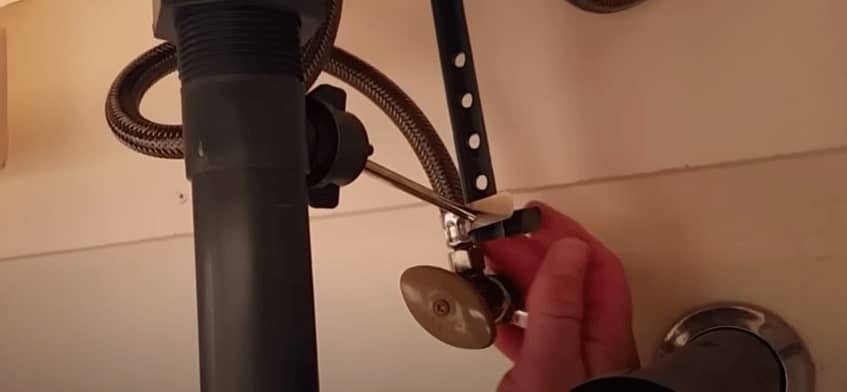
First, you need to find the horizontal pivot rod, which is attached to the clevis, a vertical strap with holes. Use the flashlight so that you can locate it easier. Remove the small metal clip that connects the two components.
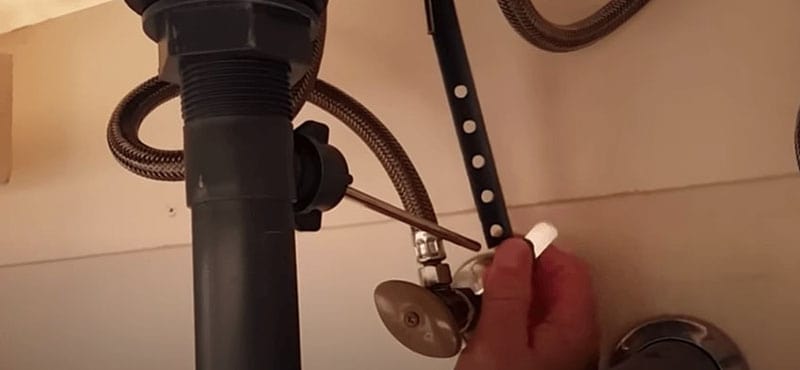
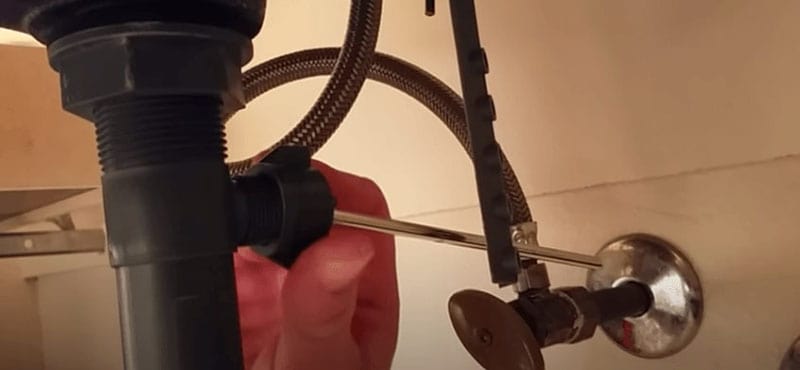
Step 2: Unscrew The Pivot Nut
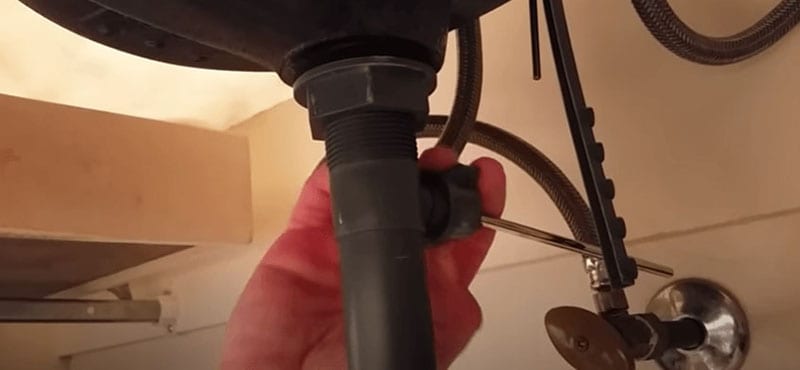
The other end of the detached rod is connected to a retaining nut that can be unscrewed by hand. As it starts to loosen, prepare the bucket to catch any water leakage. If the nut is rusted or not loosened, consider using a wrench or pliers.
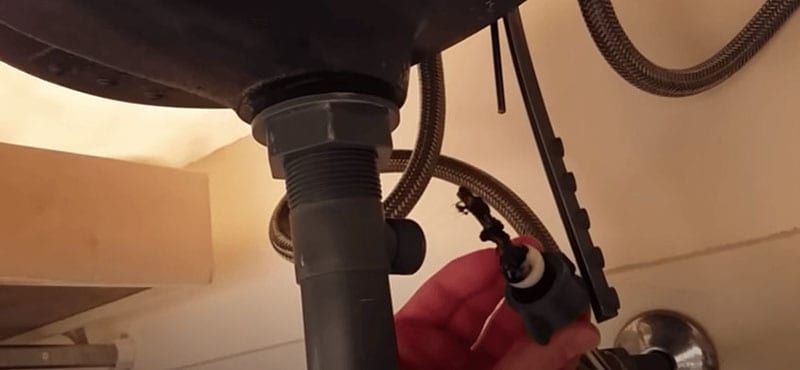
Note: If you decide to turn the nut with pliers, avoid applying too much pressure because it can damage the nut.
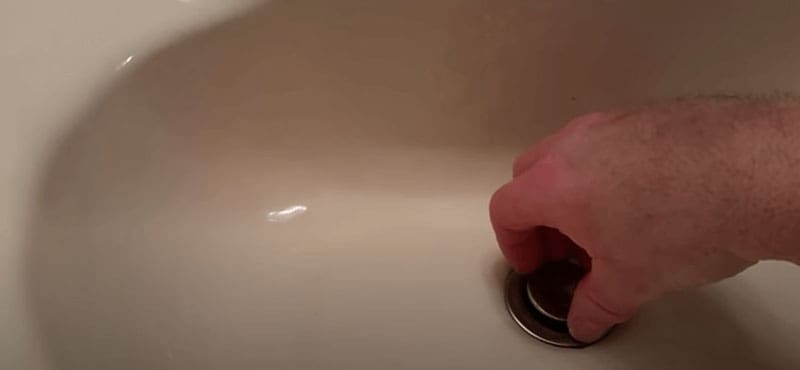
Step 3: Remove The Stopper
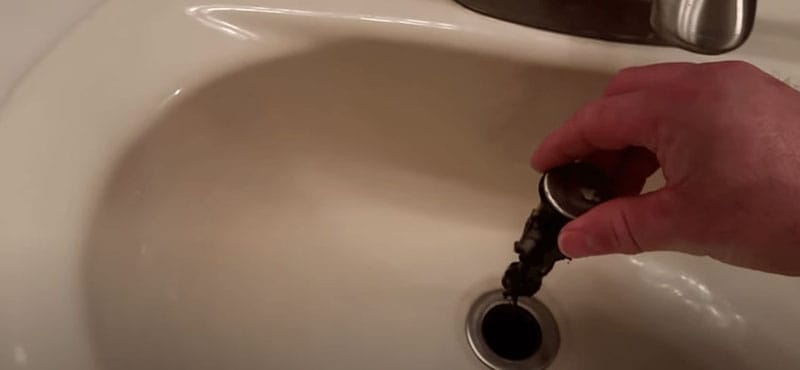
At this point, the stopper can be pulled out with no difficulties. It can be quite nasty, though, so it’s a good idea to clean it before putting it back. Use a small brush to scrape the gunk off thoroughly, then soak the stopper in warm water mixed with detergent and vinegar.
Step 4: Remove Hair In The Drain (Optional)
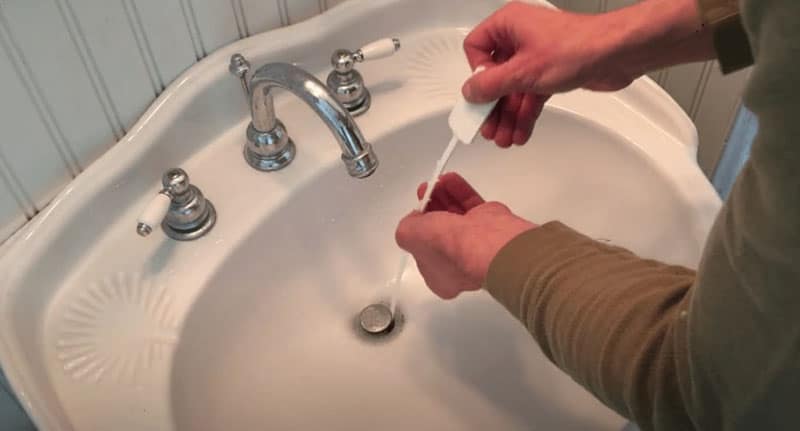
To prevent the sink from clogging in the future, you should get rid of those disgusting hair clogs in the drainpipe. There are various ways to do this, but using a snaking device such as a zip-it tool is your best bet since it does not cause much damage to the pipe.
A plunger will work just fine, yet it will not clear out the clogs as effectively as a drain snake. Moreover, excessive force can inflict damage to the pipe and cause leaks, which will cost you a fortune to repair.
Avoid using chemical drain cleaners, whether it’s in the form of liquid, gel, or powder, since the chemicals can react with the clogs and generate heat, which can damage the pipe, especially if it’s made of plastic or metal.
Step 5: Clean The Drainpipe (Optional)
Once the drainpipe is clear from those nasty clumps, it’s time to give it a quick clean. Besides hair, soap buildup is another reason that leads to blockage. It can be eliminated with salt, an effective scouring agent, and hot water, which helps melt the grease.
Supposed that it smells terrible, pour a brine solution into the sink. Salt does a wonderful job in removing bad odors and cutting through greasy substances, not to mention that it’s cheap, non-toxic, and environmentally friendly.
Step 6: Reassemble
Now that the stopper and the drainpipe are good as new, it’s time to put everything back into place. You will follow all the steps in a reverse fashion until you reach the nut. Tighten it with a wrench or pliers to ensure that water will not leak out.
Next, use the metal clip that you have removed earlier to reattach the rod to the strap. Finally, and most importantly, check to see whether the stopper is back to normal by pushing and pulling the level and check whether the water is now able to flow freely.
It doesn’t sound too difficult, right? I’m confident that you will succeed on the first attempt.
Watch this video to know more:
A Few Tips To Make The Job Easier For You
Don’t skip this section – these helpful tips will make all the work as easy as ABC!
- Give yourself some space: it’s not easy to work when there’s a lot of stuff around you. Make some room so that you can maneuver more freely. I suggest that you lie on your back.
- Check the sink stopper’s condition: if it shows signs of damage (for example, cracks), it’s time to replace it.
- Put it where it is: the clevis has many holes, and it’s necessary to remember which one is connected to the rod. Mark it with a pen or take a photo in case it slips your mind.
- Keep the parts somewhere safe: the sink stopper is made with several small parts, and you don’t want to lose any of them. Put everything in a tray until you are done with the cleaning.
- Put the gloves on: tangled hair masses and gunk are gross, so it’s recommended to put on a pair of rubber gloves.
And what should you do when the sink is still clogged, even when you have followed the instructions exactly? Bad news, my friend, the problem is probably more significant than you thought, and you’d better have the plumber take a look at it.
FAQs
Got some questions that were not addressed in the post? The next section will have all the answers to clear up your confusion. Check it out!
An Extra Reminder When Something Went Missing
Sure enough, working under the sink where things are dark and dusty will make it difficult for you to keep an eye on everything. If you happen to lose any parts of the stopper assembly, it’s essential to find the precise match.
Should you can’t find one, you can seek help from your local hardware store by providing them with brand and model details. Unfortunately, if no replacements are available, you will have to replace the whole mechanism, which can be a bit expensive.
I hope you find this post obliging, and I’m confident that you will make it after the first try. If you have further problems with the sink stopper or want to share some brilliant hacks that you know, go ahead and comment right below. I’m looking forward to hearing from you!