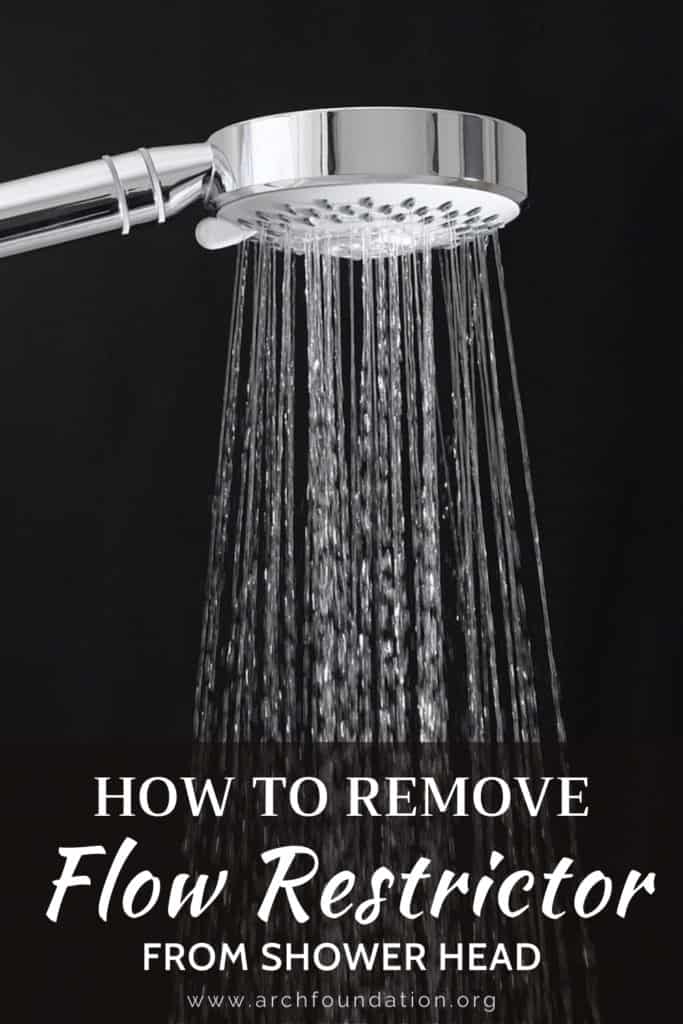
How To Remove Flow Restrictor From Shower Head
Should you be asking yourself how to remove a flow restrictor from your shower head, you are in the right place. Contrary to popular belief, the work is not challenging at all. There’s no need to call in a plumber and pay through the nose.
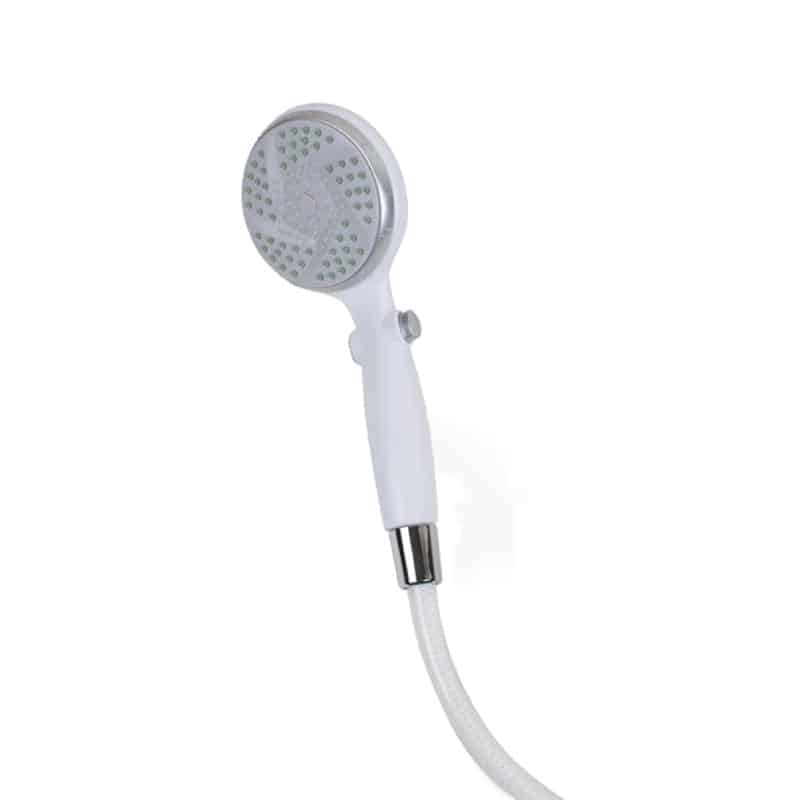
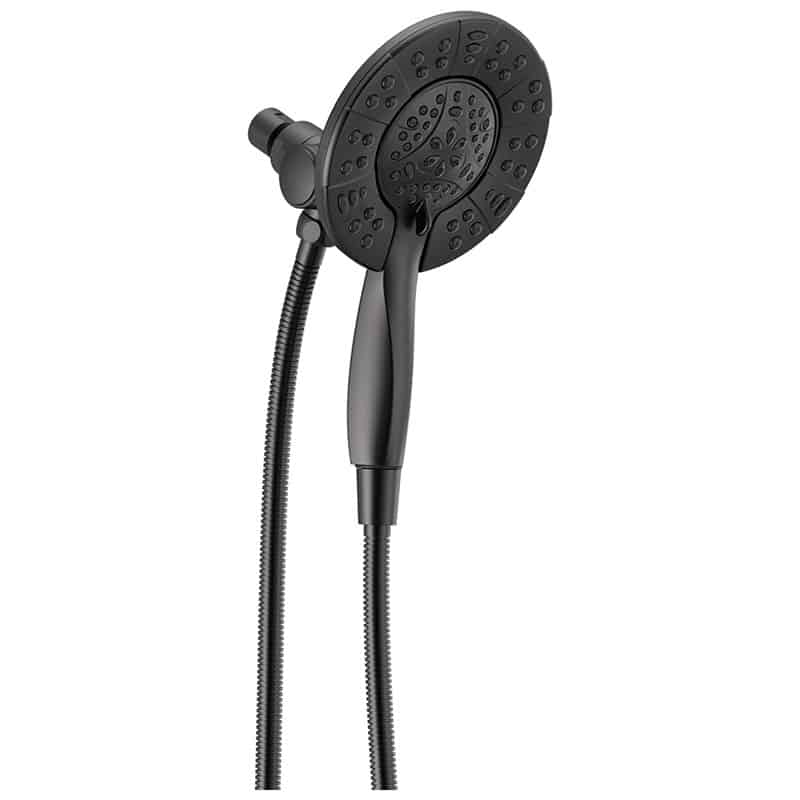
Before you begin the work, you will have to determine what kind of shower head you are using. Is it a wall-mounted or a handheld? What brand is it? Once you have got the answers to those questions, you are ready to become the handyman of your family!
Briefly, A Flow Restrictor Is Not Difficult To Remove
Most modern shower head models are required to include a flow restrictor. However, some people don’t find it helpful and want to remove it from their shower heads. If you are of their opinion, you’ll be glad to know that the procedure is pretty straightforward:
- Remove the shower head
- Pry off the washer
- Extract the screen (if any)
- Pull out the extractor
- Reassemble
The removal process will differ slightly depending on the type (embedded and handheld) and the brand (Delta, Moen, Waterpik, etc.) of the shower head.
Why Do You Ever Want To Remove The Flow Restrictor?
The flow restrictor is designed to conserve water, and it is estimated that the device reduces the water flow to only 2.5 gallons per minute. As a result, the water pressure coming out of the shower head fails to live up to your expectations.
The solution is simple: pull it out of the shower head, and you’re done. However, you had better consider its cons. Your product warranty will be voided, and water bills will go up, not to mention that it is an illegal act in some places.
If you are not affected by such factors, go ahead and let the work begin!
Remove The Flow Restrictor From The Shower Head
When you experience such problems, the solution is simple: extract the flow limiter, and you can enjoy a shower with strong sprays. How do you do that? Follow the steps below.
General Instructions
To remove the flow restrictor, you will need to disassemble the shower head and some of its components. Grab the tools listed, and let’s begin!
Supplies
- Pliers
- Adjustable wrench
- Cloth rag
- Paper clips
- Teflon tape
How-To
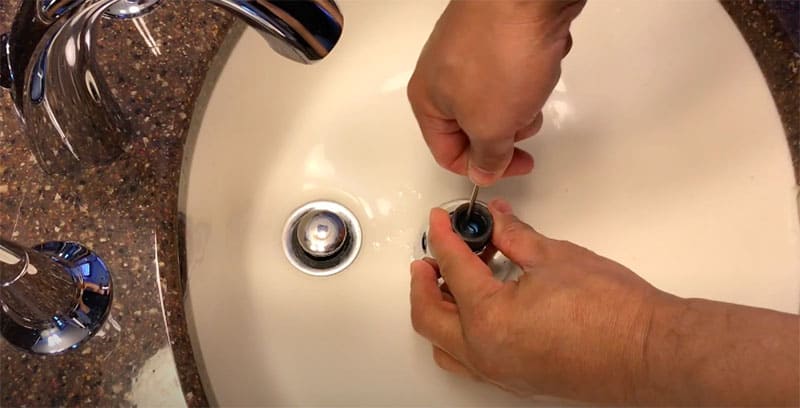
Step 1: Detach the head from the arm by loosening the nut with a wrench. Keep the fixture safe from dents and scratches with a cloth rag.
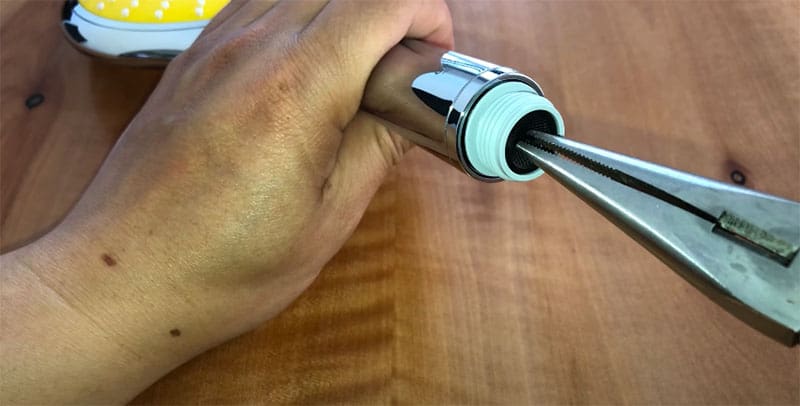
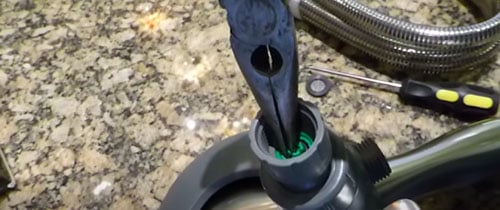
Step 2: You will see a screen at the end of the handle. Pry it off with pliers.
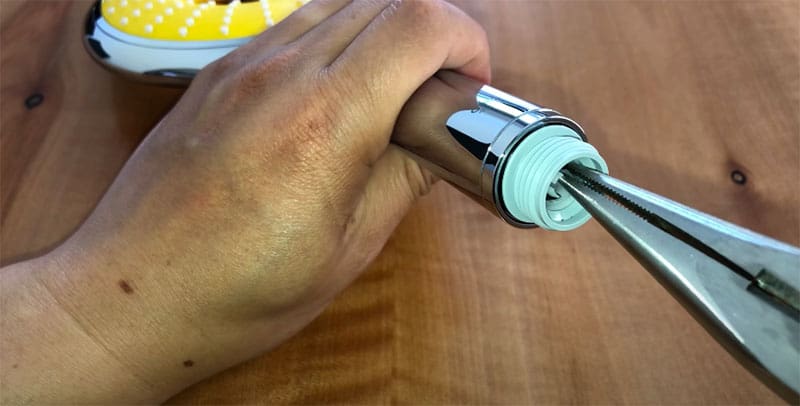
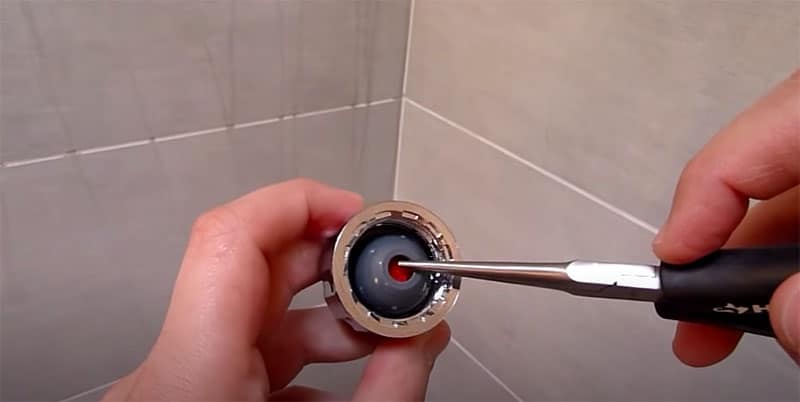
Step 3: Next, use a paperclip to extract the O-ring. This part is somewhat delicate, so do it with extreme care.
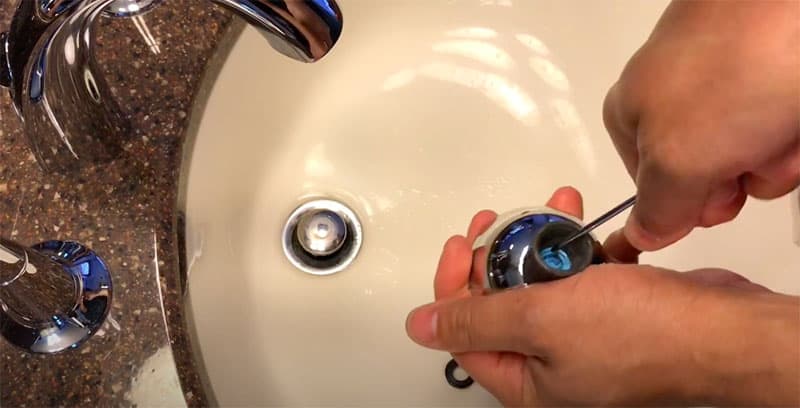
Step 4: The flow restrictor is now visible. With pliers, lift it out of the handle. Again, be gentle to avoid breaking it assuming that you plan to reuse the device.
Step 5: Reinstall the two removed components and the handle. Don’t forget to apply new tapes to prevent leakage.
In-Depth Instructions
This section will show you five techniques to remove the flow limiter. They are classified into two categories: based on the type of shower head and the brands that comply with the regulations of the Environment Protection Agency, which are Delta, Moen, and more.
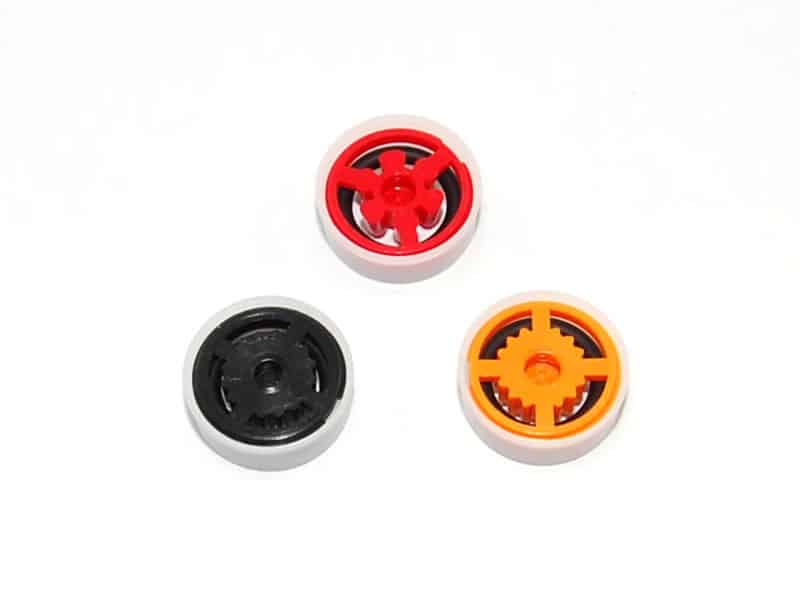
The flow restrictor is a small device made of plastic, flat, and circular, with its center shaped like a multi-pointed star. It is usually in bright colors, namely green, blue, red, or pink, and some have open inserts close to their edge.
Fixed And Handheld Shower Head
These two types of shower heads are commonly installed in many American households. They are not too tricky to remove, so you shouldn’t be worried.
Also known as an embedded shower head, this type of shower head is attached to the wall. To separate it, you will follow the steps below.

- Pliers or wrench
- Screwdriver or paper clip
- Cloth rag
- White vinegar
- Plastic bag
- Rubber band or string
- Teflon tape
Step 1: Disassemble showerhead using the following tricks:
- Try turning the shower head counterclockwise by hand first. For more leverage, hold the pipe with the other hand as you do it. Move on to the next option if this did not work for you.
- Again, turn the shower head counterclockwise, this time using a pair of pliers or a wrench. Cover the shower head with a cloth rag to avoid scratches. If this still did not work, try the next trick.
- Let the shower head submerge in a plastic bag filled with vinegar. Hold it in place using a string or rubber band, and leave it for a few hours. After removing the bag, try the second method again.
Now that the shower head is detached from the wall, you will disassemble the parts and take the flow restrictor out.
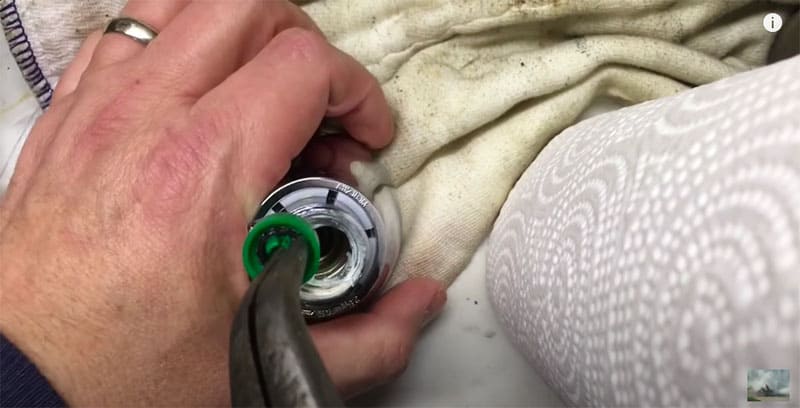
Step 2: Pry the washer off with the pliers. The washer is a small O-ring made with rubber that helps prevent leaks.
Step 3: Upon removing the washer, you will see a mesh filter or screen. Its job is to get rid of any dirt or sediment that may clog the shower.
Step 4: At this point, you will see the flow restrictor. Remove it with a flat-head screwdriver. A small paper clip will also do the job.
Step 5: Put the screen and the washer back into place.
Step 6: Peel off the old Teflon tape and wrap the new tape around the threads.
Step 7: Fasten the shower head to the arm using the wrench.
Watch this video to know more:
A handheld shower head’s flow limiter is typically located at the middle or the end of its handle. This depends on the manufacturer.
- Pliers or wrench
- Screwdriver or paper clip
- Cloth rag
- Teflon tape
Step 1: Locate the water restrictor. You can find out via the manual or manufacturer’s website.
Step 2: You will remove the shower head according to the flow restrictor’s position.
- If it’s at the handle’s end, rotate the connector nut using pliers to disconnect the head from the arm. You will also cover the nut with a cloth rag to prevent damage.
- If it’s inside the holder, use a wrench to remove the covered nut, detaching it from the hose.
Step 3: Extract the washer and the screen carefully with pliers.
Step 4: Take out the flow restrictor with a screwdriver or paper clip.
Step 5: Reassemble the parts in a reverse fashion and apply new tapes.
Note: Sometimes, you can find the restrictor at the back of the head. The removal process is similar to that of a fixed shower head.
You should see the video below:
Branded Shower Heads
There are countless shower head brands on the market today, but you can generally find a restrictor valve in Delta, Moen, and Waterpik products since 1995. Some models from Grohe and Peerless also come with this water-saving feature.
Delta has publicly stated that the flow restrictor should not be removed. Nonetheless, if you are irritated with a shower that dribbles, feel free to remove the device.
- Pliers
- Wrench
- Cloth rag
- Teflon tape
Step 1: With a wrench, unfasten the connector, protecting it with a cloth rag. Pull out the shower head.
Step 2: Delta shower heads usually don’t have a screen; thus, you only need to get the washer out of the coupler using pliers.
Step 3: You will see the water restrictor once the washer is out of sight. Gently lift the plastic piece out using pliers.
Step 4: Reinsert the washer and reattach the shower head to the pipe. Wrap fresh tapes and tighten the connection with the wrench.
You’ll enjoy the strong sprays from your Delta shower head with this tip.
Moen offers a wide selection of shower heads, and they are always of the highest quality. The only complaint Moen receives about their products is the low water pressure. If you think the same, here’s the solution.
- Pliers
- Wrench
- Cloth rag
- Screwdriver
- Teflon tape
Step 1: Like previous methods, you will detach the head from the pipe with a wrench and a cloth rag.
Step 2: Remove the rubber washer and the screen. You can do this entirely with your hand, but if either part is not loose, turn to pliers for help.
Step 3: Take the flow restrictor out using pliers as gently as you can since there are many minuscule threads on the shower head.
Step 4: The job is done. Now, reassemble the shower head and replace old tapes to avoid leaks.
You should see the video below:
If you are using a Waterpik shower head, you may notice that the water pressure coming out of it is rather poor. Don’t let that spoil your relaxing shower time!
- Crescent wrench
- Cloth rag
- Screwdriver
- Teflon tape
Step 1: With a Waterpik shower head, you will enlist help from a crescent wrench, which comes with one fixed and one mobile jaw. Cover with the rag to minimize damage to the finish.
Step 2: Extract the rubber washer. You can easily spot it between the arm and the head.
Step 3: The restrictor valve is now visible. Place the screwdriver into the hole and gently rotate the whole mechanism until it’s loosened.
Step 4: Put the washer back, reattach the shower head to the pipe, and fasten with the wrench. Same old reminder: replace the Teflon tape.
Watch this video to know more:
Established in 1936, Grohe is well-known for top-quality kitchen faucets, but their shower fixture line is also worth checking out. Like other brands, Grohe’s products also feature an integrated flow restrictor.
Grohe specializes in two types of shower head: handheld and rainfall. If you are using the handheld type, remove it as instructed earlier. Unfortunately, the problem cannot be fixed if you have the other one since most rainfall shower heads are inherently low in pressure.
Like Grohe, Peerless offers a multitude of kitchen and bathroom fixtures coming in various designs. To extract the flow regulator from Peerless’s shower heads, identify whether you have the embedded or handheld type and follow the guide provided.
Other Tips For The Job And To Increase The Water Pressure
Here are some brilliant hacks you must know to finish the job in a breeze. You will wish that you knew them sooner!
- Cut off the water supply: If you forget to do this, your bathroom will be flooded!
- Seek help from a user manual if there’s one: This post cannot cover all models, and there will be some rare exceptions. Therefore, skim through the manual and see if your shower head is one of them.
- Clean the components: If there’s rust on the nut, clean it with rust remover. The screen can also be filled with dirty gunk, which can be eliminated with vinegar. Limescale on the shower head can also be removed in similar fashion.
- Lubricate the O-ring: This will help get rid of the rust particle on the O-ring, improving its efficiency. Note that if the O-ring is broken, you will have to change a new one, which is quite costly.
- Be cautious when using the screwdriver: The tool can be quite evasive, so use it with great caution. It’s easier to remove the part with a screwdriver than a paperclip.
And finally, not all shower heads have one water restrictor!
Provided that you have the flow limiter removed, yet the situation has not improved much, here are further solutions that you should take into account.
- Clean the shower head: Over time, the shower head will clog up due to mineral buildup or limescale. Remove and soak it in vinegar, and it should work properly again.
- Check for kinks: Ensure that the hose is straightened correctly so that the water is able to reach the shower head.
- Check the valves: Make sure that the main and the heater valve are opened.
- Clean the water heater: It is recommended that you flush the water heater at least once every 6 months to get rid of the sediments.
- Install a power shower: Not only does it offer you water at the perfect temperature, but it also features a pump that helps boost the water pressure.
- Install a shower pump: The mechanism works wonders in increasing the water pressure. Consult a plumber to know the price and which model works best for your home.
And if it’s not only you that experience low water pressure, the chances that the mains water system is behind this since areas nearby the city or town center usually use old pipes. Replacing the whole system would be disruptive, so there’s no solution for this.
FAQs
If you feel that this post’s missing something you need, the following section is the last piece that completes the puzzle. Don’t miss out!
Don’t Forget To Seal And Tighten!
With this detailed guide, I hope you won’t be perplexed with how to remove a flow restrictor from your shower head anymore. Don’t hesitate to link your friend or relative to this post if they are experiencing the same issue.
And by the way, you know what they say: prevention is better than cure. Therefore, I’ll finish my job with the very last reminder: when you reinstall the shower head, remember to change the tapes and tighten it unless you want to work on it again shortly.
As usual, the comment section below is where you ask your questions, and in return, I’ll be giving the responses quickly. Indeed, tips, tricks, or any new information is more than welcome. Finally, I want to wish you luck with the work – no more low water pressure!