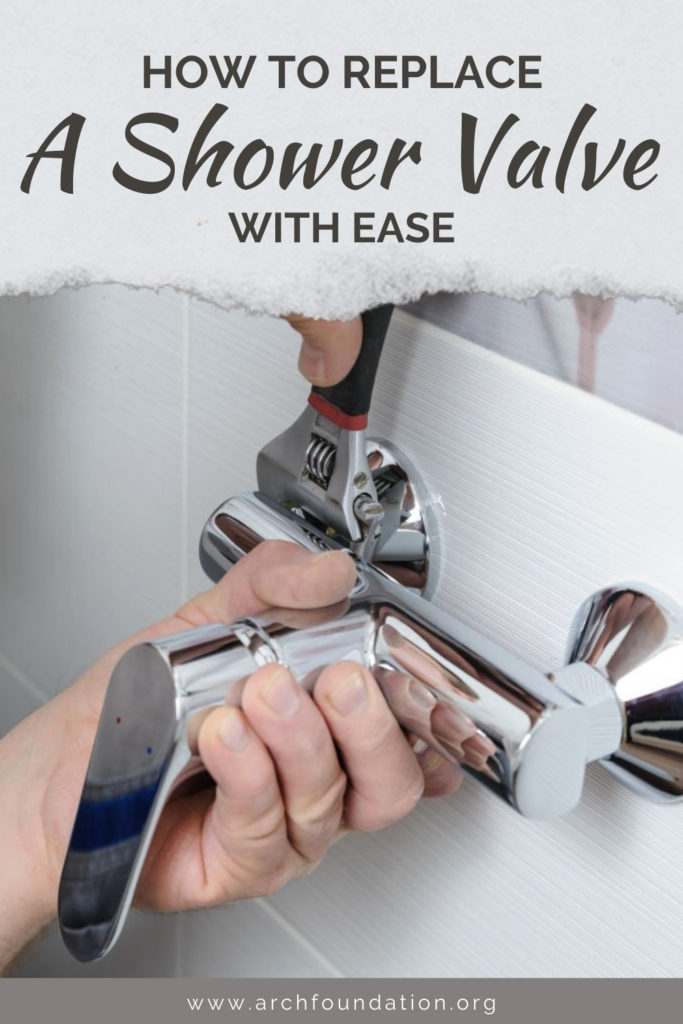
How To Replace A Shower Valve With Ease
Many people have asked me how to replace a shower valve and whether the job is too difficult to work independently. If you pose the same question, you’ll be glad to know that the answer is a big no.
Nonetheless, in certain circumstances, you will need to work with the pipe to replace a shower valve, which is when things start to get tricky. Don’t give up so quickly – it’s the chance to bring out the plumber in you, and you’ll be glad to gain a valuable skill.
People also ask me why it is necessary to replace a shower valve. There are many answers to the question, and you know it’s the right time to do it when you notice issues like leakage, limescale, abrupt temperature changes, and so on.
Are you experiencing similar problems? If so, stop hesitating – scroll down and find the solution!
Universal Guide On How To Replace A Shower Valve
Briefly speaking, replacing a shower valve is a pretty easy DIY job. All you have to do is determine the type of shower valve and its position. The step-to-step instruction below will offer you help if you are unsure which kind of shower valve you have:
- Turn off the water supply
- Remove the handle and tube sleeve
- Pull out the escutcheon plate if needed
- Extract the nut (if any) to get the stem out
- Put in the new stem
- Reassemble
To begin with, I’ll provide you with some insights into different types of shower valves and how they differ from each other concerning the function.
Classification Of Shower Valves
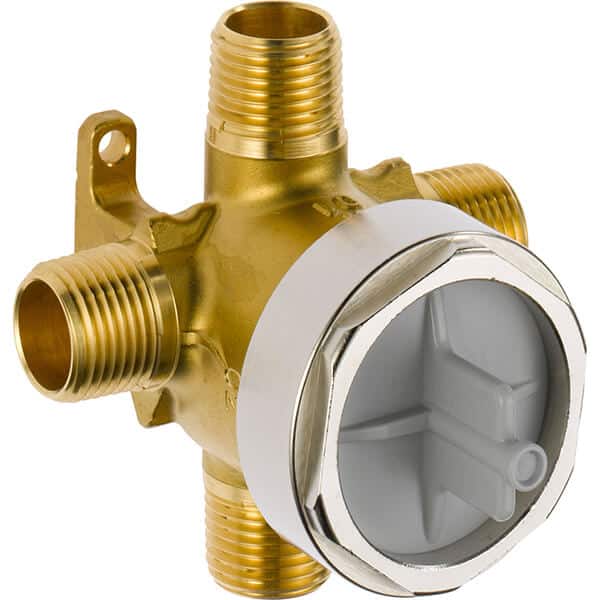
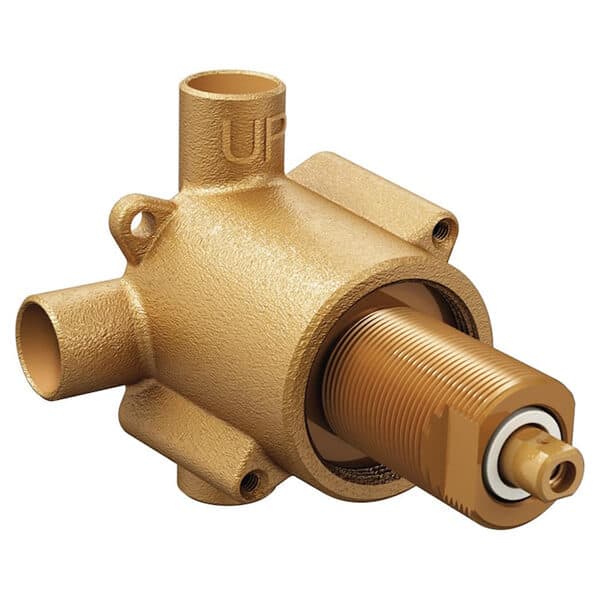
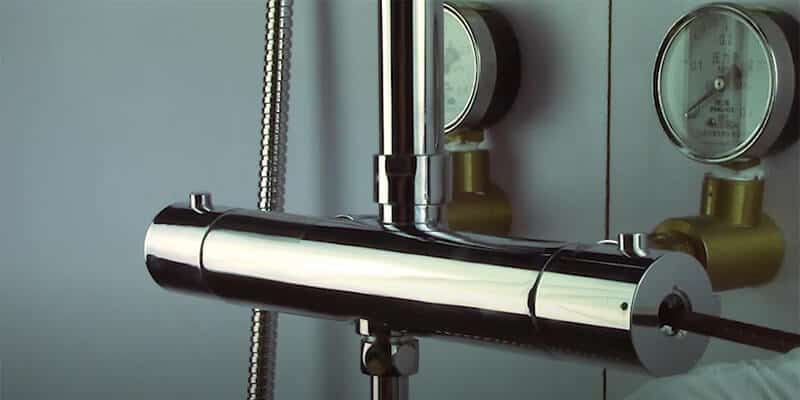
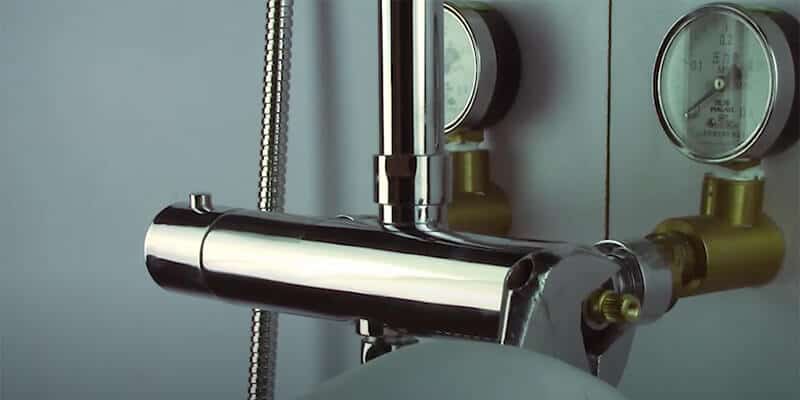
A shower valve is an essential fitting responsible for controlling the water flow and temperature, ensuring that you have a ball while showering. There are many kinds of shower valves on the market today that suit your needs and pocket.
Depending on the design, a shower valve can be hidden in the wall (concealed) or kept in a horizontal bar mounted to the wall (exposed). Most American households opt for the first choice since it is more aesthetically pleasing.
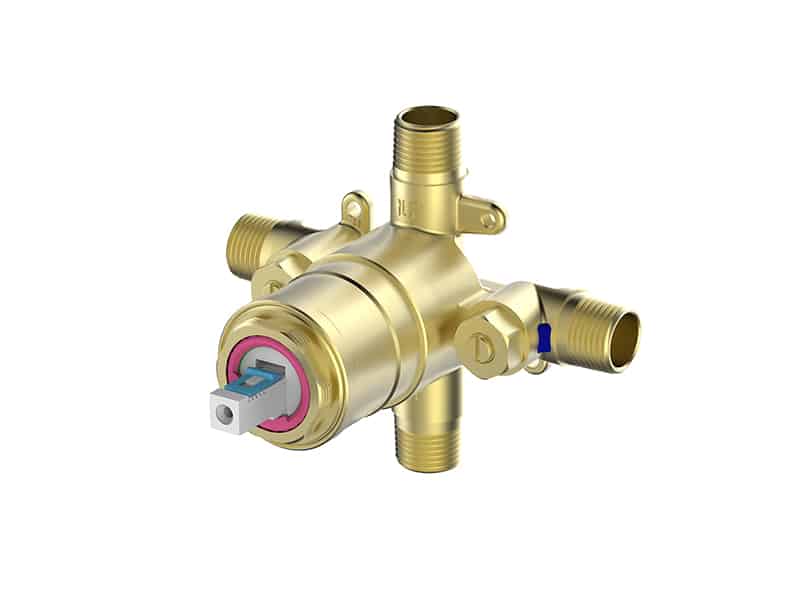
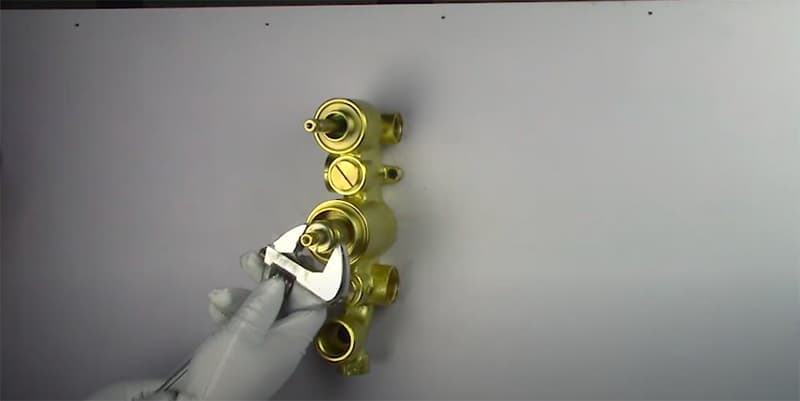
Pressure-Balancing Valves
As per the name, this type of shower valve does a beautiful job balancing the water pressure, reducing fluctuations to the minimum. Most models feature a single control and handle, so it is relatively easy to operate. It is also the most popular kind of shower valve.
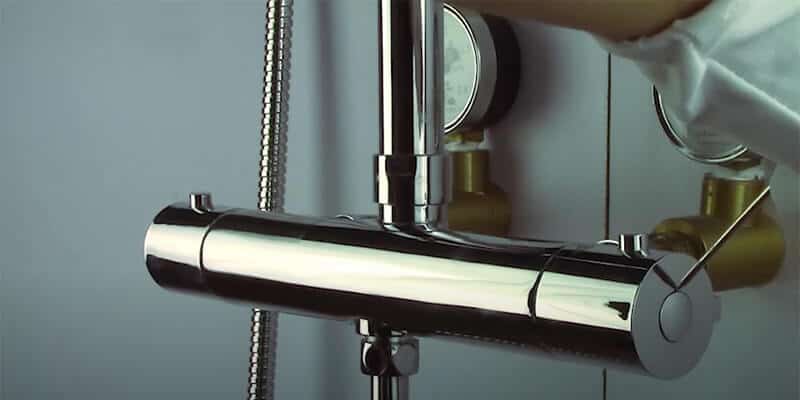
Thermostatic Valves
This kind of valve is pricey, but it comes with a special function. If you have ever experienced the water temperature increase suddenly when someone in your house flushes the toilet, the thermostatic valve will put an end to this annoying problem.
Before stepping inside the shower, you can pre-set the temperature to your likings. Plus, some new models also prevent you from scalding and react promptly to water changes. It’s a good investment, particularly if you have small children.
Mixing Valves
You will likely find a mixing valve only in older homes nowadays. Similar to a thermostatic valve, its job is to mix hot and cold water to deliver the desired water temperature. It is not as accurate as its equivalent but still does the job well.

Diverter Valves
Diverter valves are typically installed alongside pressure-balancing valves, especially if one’s household has a combined tub and shower. Their job is to distribute water to the available outlets by pushing down or pulling up a lever.
To illustrate, if you want to switch from the tub to the showerhead, you just need to pull the lever up. Some diverters also allow you to enjoy multiple outputs simultaneously, and it’s such a fantastic feature.
There are three different types of diverters, with the first one remaining the most common:
- Single-valve or T-diverter
- Two-valve diverter
- Three-valve diverter
There’s also a four-valve diverter, but it is only used in specialty shower fixtures.
Transfer Valves
Think of a transfer valve as an upgraded version of a diverter valve. It can send water to multiple outlets at once, for example, allowing you to enjoy a hot bath while you are using the handheld. However, most modern shower diverters can do this as well.
When Do Shower Valves Need To Be Replaced?
Sure enough, like every other fitting, a shower valve will go bad over time. There are lots of reasons behind this, such as unexpected temperature changes, faulty or drippy shower handles, etc.
Sudden Temperature Changes
It’s no fun when you have a steamy shower, and the temperature decreases abruptly or vice versa. When this happens, there’s a high possibility that the shower valve has been subjected to wear and tear, so it fails to adjust the perfect water temperature.
Low Water Pressure
When you notice that the water pressure has drastically decreased, a faulty shower valve is likely behind this. To fix the problem, you just need to replace the part, but the issue is often attributable to clogged or corroded pipes, scale buildup, or leaks.
Limescale Buildup
Another cause of temperature fluctuations is limescale and other particles. Over time, they will build up and prevent the water from reaching the outputs or working properly, affecting your shower experience.
Leaks
Leaks occur for many reasons, and you can expect one of them to be something related to the shower valve. When this component is faulty, corroded, or damaged, constant dripping will appear, causing rust stains or facilitating mold growth.
Difficulty With Turning The Handle
Does the handle seem stuck? You can turn it one way but not another? If similar issues arise, you can be confident that you have a faulty shower valve.
Improper Installation
Yes, this problem happens quite frequently, especially for the DIY-ers who are not used to plumbing work. If you are uncertain about replacing a shower valve, the next section is here to give you a hand.
Replace A Shower Valve – No Hassle, No Fuss!
Replacing a shower valve sounds like hard work initially, but with this detailed guide, even beginners will succeed, rest assured. Before replacing the valve, you must shut the water supply off to prevent flooding.
For the next step, you will have to determine what type of shower valve you are using. Is it a concealed or an exposed valve? Once you know the answer, you are ready to begin the work. Here’s a general guide to help you get a quick overview of what you’re going to do.
General Guide
I’ve compiled this easy guide to help you replace a shower valve in no time. It applies to most current models on the market, so you can be assured it works with yours, too.
What You Need
- Screwdriver
- Socket wrench
- Pliers
- New shower valve
- Sharp knife (optional)
- Strap wrench (optional)
Step 1: Shut the water supply off.
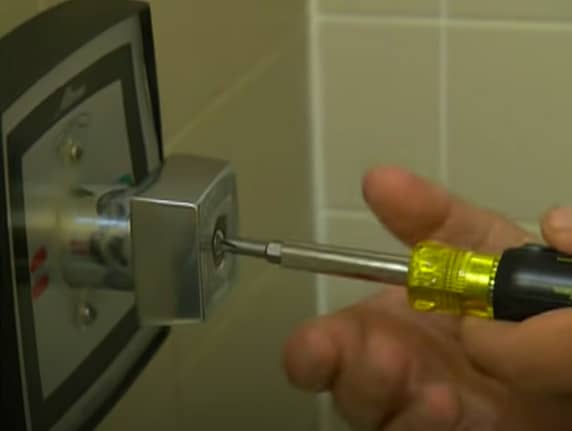
Step 2: Pry off the cap to find the screw. If your handle has no cap, the screw is located on either side of the handle.
Step 3: Unscrew the handle using a screwdriver.
Step 4: Remove the tube sleeve.
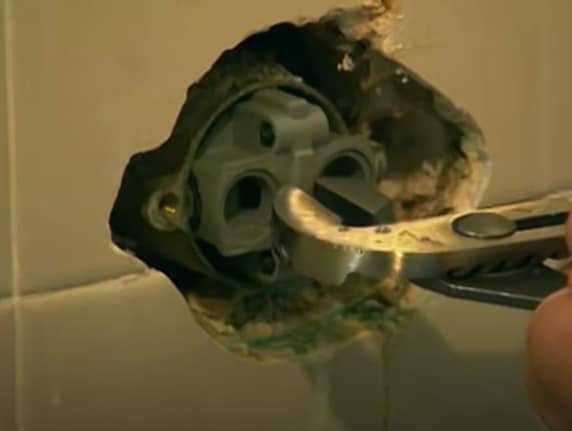
Step 5: Remove the escutcheon if it gets in your way, restricting your ability to maneuver. To do this, unscrew the two screws that hold them in place and pull it out. Strap wrench may help in case it’s stubborn.
Step 6: Extract the locking nut if there’s one using the socket wrench.
Step 7: Grip the head of the stem valve and pull it out gently with a pair of pliers.
Step 8: Survey the shower valve. In most cases, you will only need to replace the washer. Should it be damaged beyond repair, purchase a new shower valve in the same model.
Step 9: Reverse the process and test the result.
In-Depth Guide
Moving on to this comprehensive guide, I’ll show you how to replace a shower valve based on two factors: its type and location (concealed or exposed).
According To Shower Valve Types
As mentioned above, there are five common types of shower valves. The work will also begin with removing the handle, tube sleeve, and faceplate as listed in the general guide (step 1-5).
Pressure-Balancing Valves
Replacing a pressure-balancing unit is super easy as long as you have this guide with you.
What You Need
- Screwdriver
- Allen wrench
- Pliers
- New shower valve
- Plastic tool (comes with new valve, can be purchased separately)
- Cartridge puller (optional)
What You Do
Step 1: Remove the components as instructed to expose the shower valve.
Step 2: There will be a clip on the top of the valve, which is responsible for keeping it in place. Lift it out of its position with pliers and keep it somewhere safe.
Step 3: Use the plastic tool supplied with the new valve and carefully pull the extractor out. Alternatively, the job can be done easier with a cartridge puller.
Step 4: Install the new shower valve. With the help of the plastic tool, position the valve correctly.
Step 5: Reinsert the clip and other parts.
Step 6: Inspect your DIY work. The drippings have magically vanished!
Thermostatic Valves
Before beginning the work, make sure that your thermostatic valve is up to standard. It has to meet the following criteria:
- The hot supply is on the left, whereas the cold one is on the right
- The distance between the valve connectors is roughly 150mm.
- The space from the wall to the connector is about 40mm.
If it fails to meet any requirement, you may have to call a plumber. Otherwise, you’d better start now!
What You Need
- Screwdriver
- Wrench
- Pliers
- New shower valve
- Socket wrench (optional)
What You Do
Step 1: Remove the components according to step 1-5 in the general guide.
Step 2: Turn off the stop-check valve if there’s one. If not, you will have to shut the main valve of your entire house.
Step 3: Disconnect the valve from the unit by dislodging the clip with pliers. Some other models require you to loosen the bolts and nuts first.
Step 4: Deactivate the thermostatic mechanism using the wrench. If it’s too deep and out of your hand reach, turn to a socket wrench for help.
Step 5: Attach the new valve to its position.
Step 6: Turn on the stop-check valve and reassemble the faceplate, then the handle. Test your result to see whether leaks still come out.
Mixing Valves
Faulty mixing valve? I got your back with this detailed guide.
What You Need
- Screwdriver
- Wrench
- Pliers
- New shower valve
What You Do
Step 1: Likewise, take the exterior components apart to work with the shower valve.
Step 2: With a mixing valve, you will have to stop the water flow before pulling out the old valve. You will do this by turning the screws on the shut-off valves.
Step 3: Some valves are secured by a cap. Remove the cap by unscrewing the two screws located on both sides.
Step 4: With a pair of pliers, gently slide the valve out of the opening.
Step 5: Replace the washer or the whole stem depending on its condition. Reinsert the cap and join both pieces with the two screws.
Step 6: Open the shut-off valves.
Step 7: Reverse the procedure and check your result.
Watch this video to know more:
Diverter Valves
Most diverter valves are very easy to replace. You will follow the general guide to carry out the work. However, take note that there are two kinds of diverter valves: rotating and gate-type.
For the former type, unscrew the nut at the valve’s end to remove the valve. For the latter type, you will have to unscrew the threaded tub spout.
Watch this video to know more:
Transfer Valves
Unfortunately, replacing a transfer valve is complicated and should not be conducted unless you have plumbing experience. If you have this kind of shower valve, it’s best to hand the job over to a professional.
According To Shower Valve’s Location
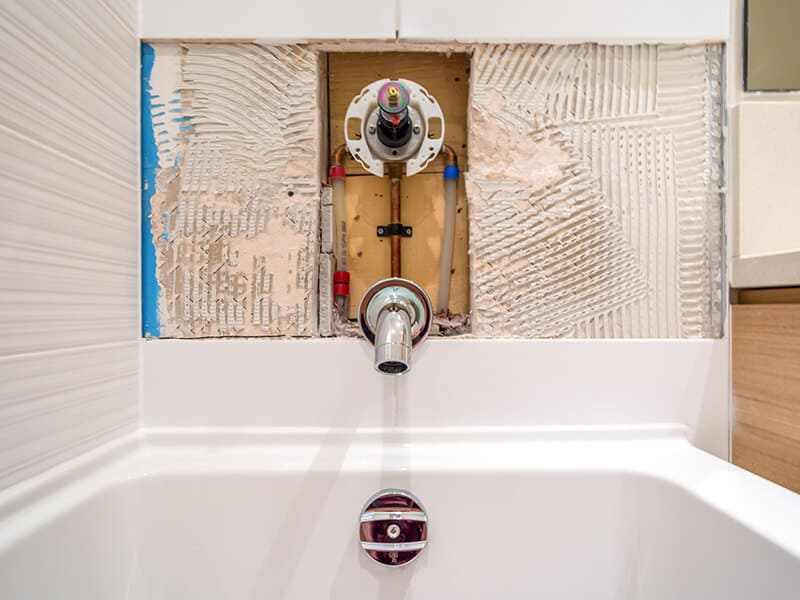
Shower valves can also be divided into two categories based on their position. Those located inside the wall are called concealed valves, and conversely, exposed valves.
Concealed Valves
To replace a concealed shower valve, you will have to break the wall open. Overall, the job is a little complicated but not impossible. Keep reading to see the required tools.
What You Need
- Screwdriver
- Wrench
- Allen wrench
- Mini hacksaw or copper tubing cutter
- Pliers
- New shower valve
- Small knife
- Cloth rag
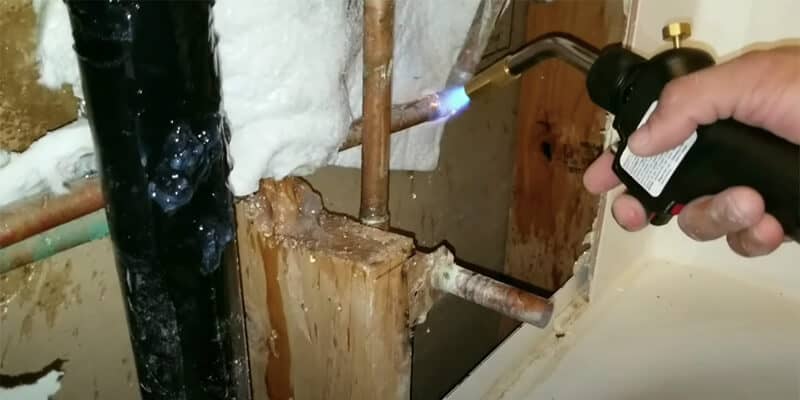
- Soldering iron
- Marker
- Pipe cement (optional)
- Couplings or fittings (optional)
And, of course, you will need a new shower valve. Suppose you don’t know the model you are using, you don’t have to risk buying it beforehand. As you remove the old shower valve, bring the component to the hardware store and find the exact replacement.
Got all the required tools? Let’s begin the plumbing project!
What You Do
Step 1: Follow the steps in the general guide to remove the handle and escutcheon plate.
Step 2: Upon removing the plate, you will see a hole on the wall. If it is no more than 12 inches, you will have to enlarge it. It is recommended that you cut it to a size as large as the plate so that you can cover up the hole later easily.
Note: You will choose the appropriate tools depending on the material of the wall. For instance, if it’s fiberglass, you will use pliers to break out the pieces.
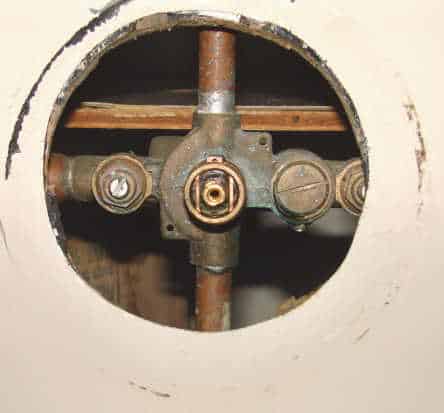
Step 3: Take out a small metal clip that retains the valve using a pair of pliers.
Step 4: Remove the retainer nut using a wrench. If you don’t see it, skip this step.
Step 5: You will see the valve as the nut is out of sight. With a pair of pliers, grip its head and carefully pull it out. If the valve does not budge, wiggle it gently until it is released.
In some cases, you will have to cut the pipe to extract the valve. To begin with, determine where you will cut the pipe by marking it with a marker. For exact measurements, you’d better have the new valve with you as you are working on this.
For copper pipes, your best bet is a copper tubing cutter, but a mini-hacksaw should also do the job, especially if there’s not much space. To ensure that the new valve fits the pipe, couplings and fittings may be required.
Step 6: If you have the new valve at your disposal, move on to the next step. If not, visit the nearest hardware store and purchase one. Bring the old valve with you to make sure that they are identical.
Step 7: Now, you will begin inserting the new valve into the hole. Again, if it doesn’t slide smoothly, turn it back and forth slowly.
Note: If it does not seem to fit the slot, you have likely bought the wrong size. You have no choice but to return to the store and exchange the piece.
Step 8: Return the clip that you have removed earlier back into its place using pliers.
Step 9: Connect the valve to the water supply.
- With PEX pipes, you will join male and female threads with Teflon tape. Then, connect coupling and pipe-crimp fittings.
- With CPVC pipes, you will glue them with pipe cement.
- With copper pipes, you will solder them.
Note: Consult an expert before carrying this out on your own. Different materials will call for other techniques. In addition, keep the pipes dry and clean before connecting the water supply.
Step 10: Before reinstalling the plate and the handle, test your work first to save your time. Check whether there are leaks or problems with the installation, namely, a part slips out of its position when the water runs.
Note: Let the water run for a few minutes before reassembling. This will help get rid of the sediment inside the pipe.
Step 11: Apply a layer of caulk to create a seal, fix the trim plate back to the wall, and reinstall the handle. Ensure that they are properly fastened to avoid leakage. Check your work by turning the faucet. You’ll be relieved to see everything back to its normal.
Note: Cutting a bigger hole or pipes is only required when you cannot pull the valve out with other tools.
Watch this video to know more:
Exposed Valves
With an exposed valve, the repair process is much easier since it is, well, exposed instead of hidden underneath the wall. You can expect to finish the job in less than an hour.
What You Need
- Flathead screwdriver
- Philips head screwdriver
- Adjustable spanner
- New shower valve
- Bucket (optional)
What You Do
Step 1: The shower valve is kept inside a horizontal bar. To get it out, you will first extract the cap using a flathead screwdriver.
Step 2: Once the cap is popped out of its place, you will see a screw. Unscrew it using a Phillips head screwdriver.
Step 3: Depending on the model, you will see a retaining nut. Pull it out by hand if there’s one.
Step 4: With an adjustable spanner, turn the spanner counterclockwise and get it out until it is loose. Don’t worry if there’s water dribbling out of the opening. Place a bucket under if you wish.
Step 5: Get a new valve from the home improvement store. Again, make certain that the model is the same so that it fits the bar.
Step 6: Push the new valve back into the empty bar and secure it with the spanner.
Step 7: Reinstall the control knob, followed by the end cap using the same tools as you remove them. Fasten the parts properly to prevent leaking.
Step 8: Power up the water supply and check your result. If nothing seems to go wrong, you have done it!
Watch this video to know more:
Things You Must Know About Replacing A Shower Valve
As usual, this section will cover you with some of the most helpful tips so that you can finish the job quicker. Skip it, and you’ll regret it!
- Purchase essential supplies beforehand: While you are working with the shower, your family won’t be able to access other appliances since the water supply is shut off. To save your time, I suggest buying the tools and replacements in advance.
- Clean and replace the hardware components if needed: You can clean the plate and the handle with vinegar or CLR. If any part shows visible signs of corrosion or damage, replace it so that everything works perfectly.
- Don’t lose the parts: Cover the shower drain with the cloth rag to prevent the parts from going missing. As you take the pieces apart, keep them somewhere safe until you need them.
- Remove stubborn valves: Spray the valve with WD 40 if it resists. This also helps minimize damage to the pipes.
- Prepare for soldering: Clean the surface properly using sandpaper. If anything gets in the way, the pipe will not be appropriately sealed and cause several leaks.
- Turn the water supply on slowly: If possible, ask someone in your family to do this for you while you keep an eye on the fixture. Assuming that it is not correctly installed, the water will burst out abruptly.
Lastly, some issues are impossible to deal with when you don’t have enough plumbing experience. If you face issues like loose tiles or pipe damages, or if your house is more than 40 years old with an intricate plumbing system, hand the job over to a professional.
FAQs
Replacing a shower valve is a daunting task, and I can tell that you have many questions even when you have read the post carefully. Don’t worry; the following section has all the answers to clear up your confusion.
A Friendly Warning
Learning how to replace a shower valve is, no doubt, immensely helpful. Not only will you get to save your pennies, but you will also impress your family with your DIY plumbing skills, and I’m certain that they are more than happy to have the problems resolved.
There’s a thing about working with the shower valve, as you have known, is the difficulties regarding opening and cutting the wall. Sometimes, you will have to carry out an extra step with cutting and soldering the pipes, which is definitely not a job for beginners.
Therefore, if you attempt to work on those things yourself, make certain that you do every research you need. Suppose you don’t think you can finish the job, I suggest hiring an expert to help you out. You don’t want further problems, do you?
I hope this post has given all the information concerning how to replace a shower valve. If I happen to miss anything, feel free to contribute to my post by commenting below. Indeed, your questions are also welcome. Good luck with the work!